School Holiday Project- Making Planter Magnets
“Mum, I’m hungry. Mum, I’m bored. Mum? Mum…Dad?!” Oh the joys of school holidays are upon us and who doesn’t love the kid’s endless requests for constant entertainment? Keeping them busy is the key and this simple Feast Watson project is perfect for getting the kids involved and engaged. On top of the obvious benefits of occupying the ankle-biters, these beautiful timber stained Planter Magnets also make a great little home styling piece.
Making Planter Magnets couldn’t be easier and any parent, grandparent or carer should be able to achieve the project with a few basic decorator skills and limited materials. The steps in the how to guide and video support the creation of these beautiful planters and you can easily prepare and style the timber stained planters to suit your home’s unique look using the colours available in the Stain and Varnish range.
The timber stained planters look great in the kitchen, bathroom or laundry. Combining natural timber in your home with indoor plants is a simple and effective way to modernise your home. The wood stain and plant combo also brings a touch of nature to these areas of your home. Depending on where you choose to stick these durable little planters, you can also adapt them in so many ways, making them functional and multipurpose. Importantly, no matter where you choose to put them, you can be guaranteed they will look great with the interior Stain and Varnish colour range.
Picking the right look for your planters is a great place to begin and get the kids involved. You can use any timber off-cuts you have around the house, such as treated pine. Ideally your timber pieces should be around 50mm x 30mm, but any block size off-cut will work for the project.
Now, the fun part is selecting timber stain colours. Liming White is a popular choice, giving a scandi-look to the planters that suits most styles of home décor. Darker colour options in the Stain and Varnish range include Black Japan and Chocolate Walnut. Most timber finishes in the range are a one-step Stain and Varnish, this means you don’t have to coat with varnish separately unless you choose. If you prefer to maintain the natural look of the timber you are working with, you may select a Prooftint option that suits the desired timber, such as Oak Prooftint or Jarrah Prooftint. The Planter Magnets could also be used to style your outdoor areas by using an Exterior Stain and Varnish instead. In any case, go for a colour that you and the kids love and best suits your timber. With a simple timber project like this, any interior timber stain will do the job and with Feast Watson wood finishing products you will achieve a quality finish every time.
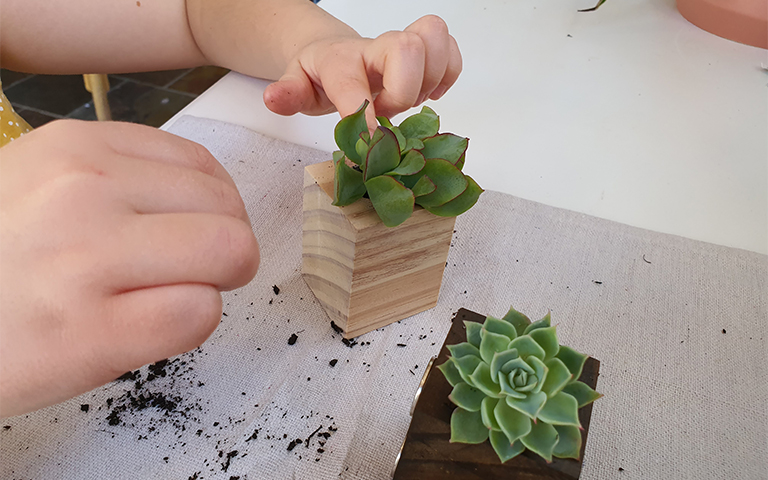
Another fun part is selecting plants for your stained planter. Succulents are a durable option, easy to plant and can be grown from offcuts. If you plan to hang the planters in a wet area, such as a bathroom, you can also use moss or small ferns. Orchids grow well in moist areas, such as the laundry and bathroom and need little soil to thrive. In the kitchen, why not grow some micro-herbs or alfalfa sprouts? The kids will love watching them grow and have the satisfaction of seeing their creation come to life. If you plan on popping your planters in a dark area or just can’t be bothered watering, you can use artificial options too. Other uses for these versatile, timber stained Planter Magnets include styling your child’s bedroom. You can achieve this by adding colourful pom-poms (instead of soil and plants).
Now that you have your Stain and Varnish and timber selected, it’s time to exercise your DIY skills. The first few steps of the project do involve power tools, so make sure you are all wearing safety gear and that only adults are operating power tools. Also, make sure the kiddies are supervised during the entire project and wear gloves and goggles while coating the timber to protect their little hands and eyes.
What you need:
- Your choice of timber (around 50mm x 30mm per planter). Make as many platers as your little human desires. This will determine how much timber you need in total
- Your favourite Feast Watson coating
- Soil/potting mix (you can buy this or use some from the garden)
- Your choice of plant
- 2 strong self-adhesive magnets per planter (these can be found at any hardware store)
- Sandpaper
- Paintbrush
- Stirrer
- Any protective gear needed for you and the kids
Tools you need (adults use only!):
- Drop Saw (or hand saw)
- Drill
Step One: Reuse It!
Use any kind of timber off cuts you have. Ideally your pieces of timber will be around 50mm x 30mm. You can use any size you like depending on how big you want the planters to be, however making each planter small (about 50mm x 30mm) will mean the magnets will be able to support the weight of your planter.
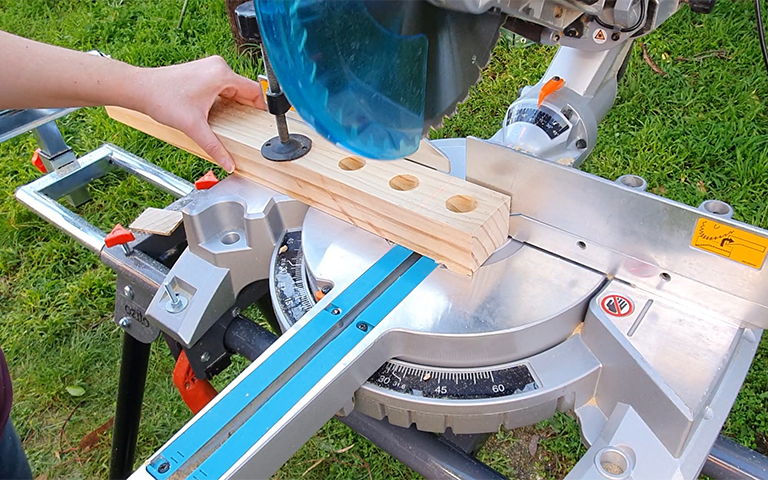
Step Two: Drill it!
Drill 25mm round holes along the length of your timber, spacing them evenly apart. You need one drilled hole in each planter.
Make sure you don’t drill the whole way though the timber. Aim to have a hole around 10mm deep. This is where you will pot your plant after you have stained your timber.
Step Three: Cut it!
Cut your timber into individual pieces making sure to have 1 hole per piece. You can use a drop saw or a hand saw to get this job done.
Step Four: Sand it!
Get the kids to sand their planters on every side. Any sandpaper is fine, but for a super smooth finish, use 80 grit followed by 120 grit. Safety gear is advised for the little one’s while at work.
For little hands: Place a piece of sand paper on the table and slide the planter along the sandpaper.
For bigger hands: Wrap the sand paper around a small block and use it to sand each side of the planter.
Make sure you clean off any sanding dust and then the kids are ready to get coating.
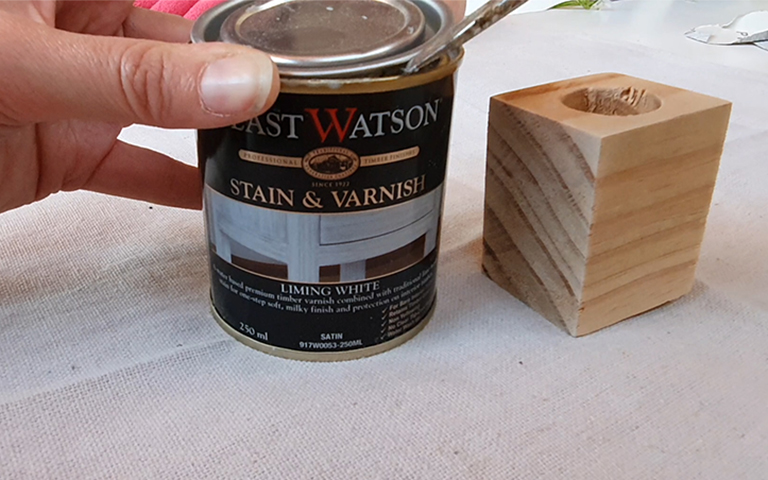
Step Five: Coat it!
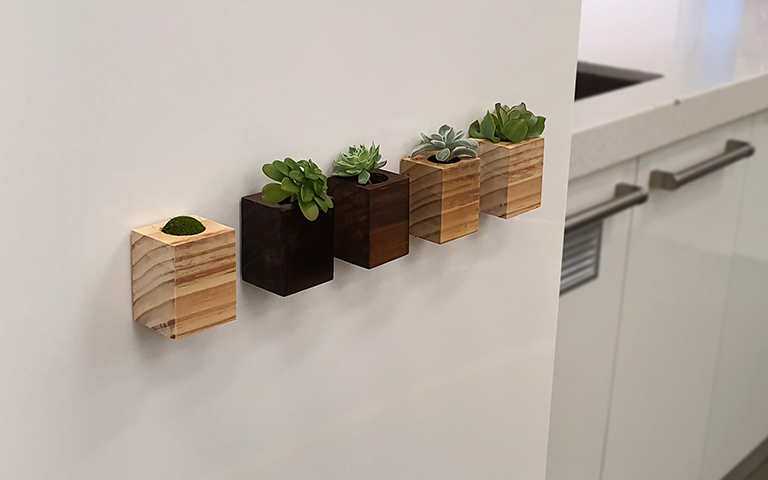
Grab the kid’s favourite choice of Stain and Varnish colour. The examples shown are Liming White Stain & Varnish, Black Japan Stain & Varnish, and Oak Prooftint. However any colour in the Feast Watson range will work well and look amazing.
Get the kids to stir the pot and dip their paintbrush in and coat all sides, top and bottom of their planter. If you want a richer finish, let the coat dry and apply another coat.
Then, let the stain dry overnight.
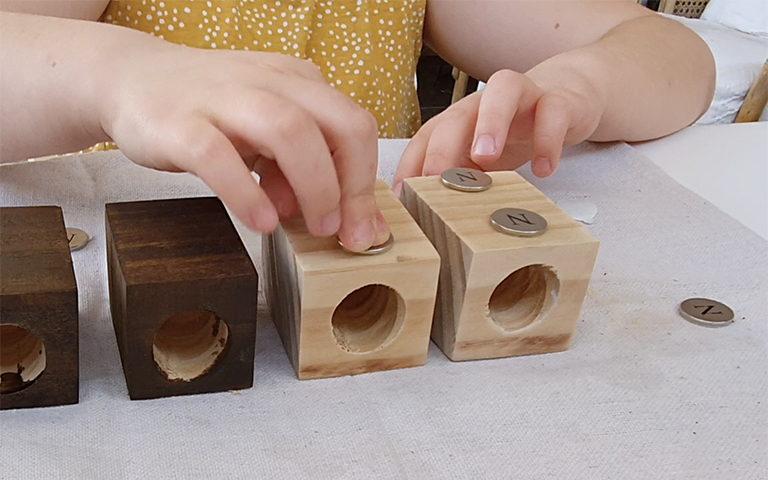
Step Six: Stick it!
Grab your strong self-adhesive magnets with stickers on the back. Stick 2 adhesive magnets on the back of each planter. Let these settle in for a few hours before testing their adhesive power on the fridge.
Step Seven: Plant it!
Get the kids to fill each hole with a little potting mix and pop their choice of plant in each planter. Put some water in for the plants to thrive and make sure you give your plants a bit of water every now and then to keep them alive.
Step Eight: Enjoy it!
Find the perfect spot to stick your planters. You can pop them on the fridge, a magnet board or in the bathroom or laundry.
Maintain their timber-stained look by recoating after about a year. Water the plants regularly and you can even replant with different plants as your tastes change.
Completing this easy school holiday timber project will leave you and the kids satisfied and proud, as well as keep their little hands busy while they are at home. The planter’s natural timber stain looks amazing and brings a touch of the outdoors inside your home. The planters are so stylish and can be customised to suit so many spaces around the home by carefully selecting a Stain and Varnish that suits your space. The kids will love spending time with you, staining their planter and potting their plants. What a great project to complete together this school holidays!
How To video
Sometimes it's just easier to watch someone else do it don't you think? Take a look at the video here if you would like to see it in action.
Suggested Products


Suggested For You


