Building a Laptop Table
I recently started working from home. ‘No worries,’ I thought ‘I totally got this’. I imagined myself sleeping in late, moving my laptop from bed to couch in a haze of freshly brewed coffee bliss. Reality hit about a week in, when I realised I have no home office space and that the only person making money from my home-working arrangement was my chiropractor.
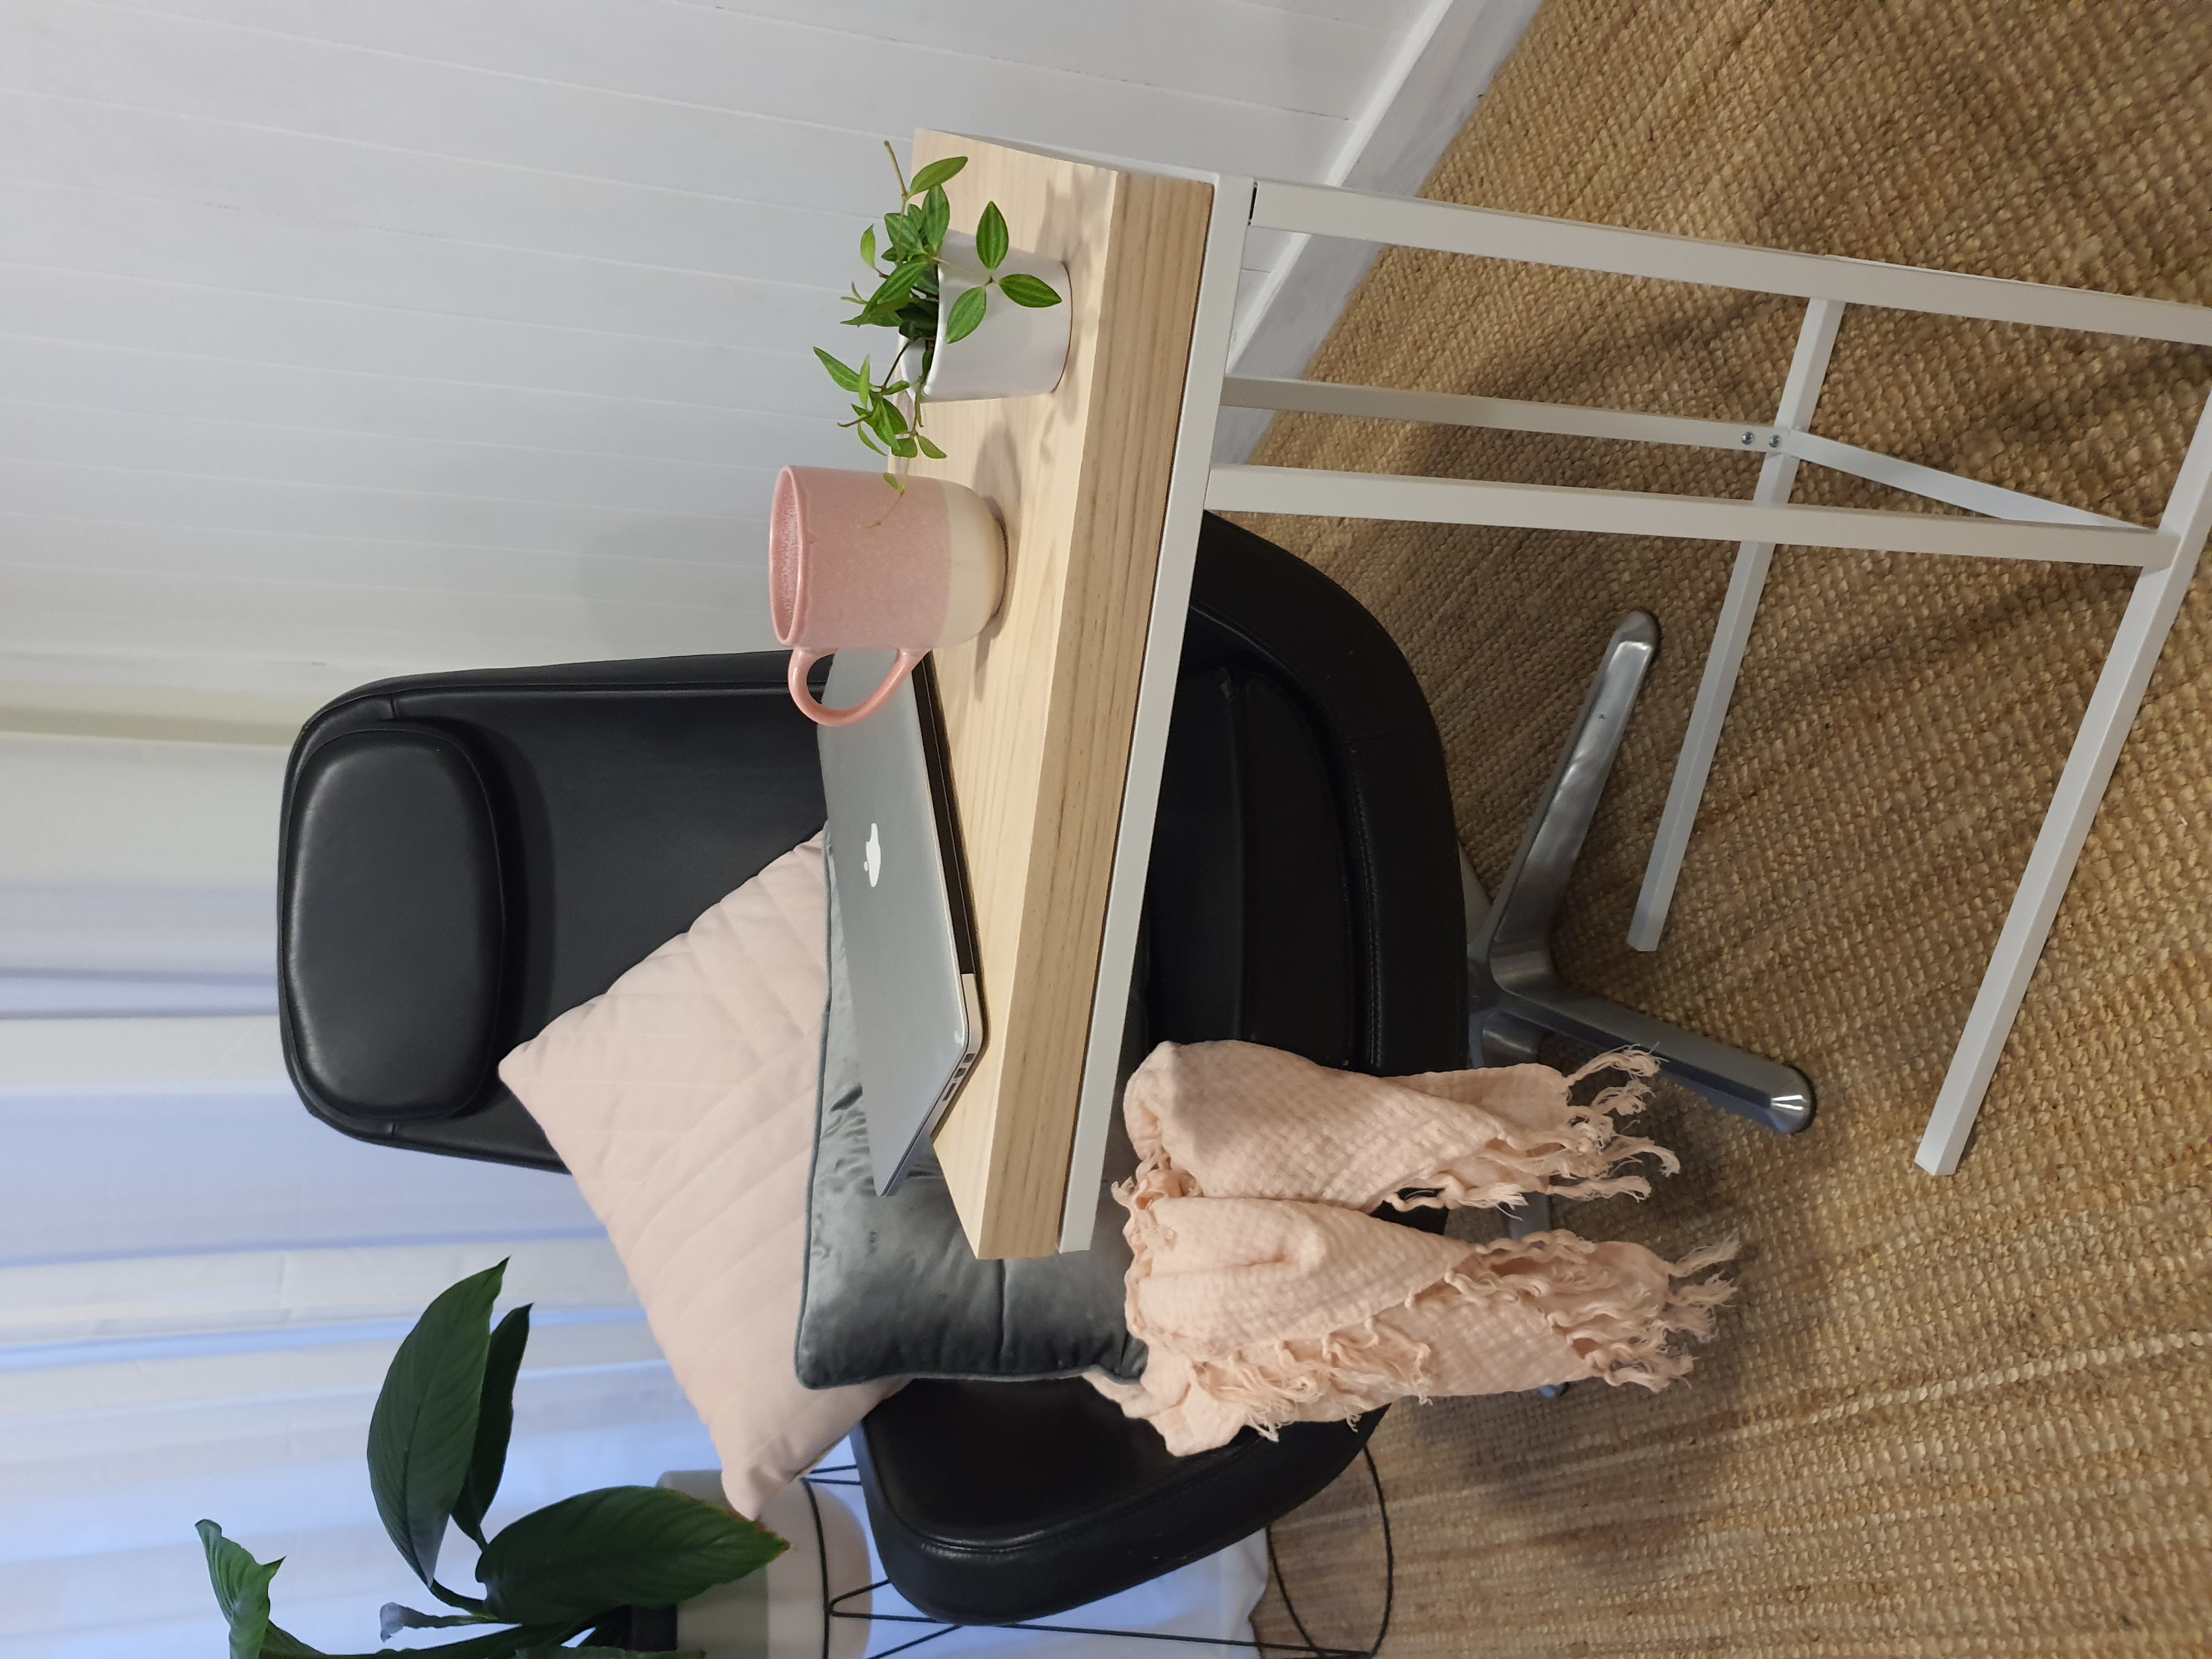
I researched solutions and found the most beautiful wood stained and varnished laptop table, fully moveable from space to space around my home. Perfect, as I didn’t have to give up the luxury of my bed and also practical for everyone else in the house to use for homework or researching on an armchair in the evening. The piece was stylish and classic, the depth of tone in the wood varnished grain gave it true character. Of course it was also way out of my price range. Fortunately a clever Ikea hack and some power tool therapy allowed me to create the perfect custom laptop table using my favourite wooden furniture varnish. Here’s how I did it.
First, decide on your favourite Feast Watson Stain and Varnish, designed specifically for interior timber. You can select any stain to fit your home, including; Black Japan, Liming White, Oak or Matt. The latest coating range allows you to tailor your timber look to your taste and has the durability and reliability to achieve a quality finish. What I love is that it is a one-step Stain and Varnish, meaning you don’t have to coat with varnish separately unless you choose. I decided on Liming White, matching my white stand and for a scandi-look.
The timber you choose for the top is up to you, however because the Stain and Varnish gives such a smooth finish, I decided to save some money and just use treated pine. The Feast Watson ‘How To Guide’ and Video make it easy to follow the steps. You want your timber to be cut to 350mm x 550mm to fit the existing stand, however to keep the knots in the timber, I cut mine in to two pieces. After cutting the two pieces with my circular saw, I joined them by marking out and making 3 biscuit joins and then gluing them together. Once the glue was dry, I sanded every edge and side for a smooth finish. As always when painting, you want to have a great base, so a good tip is to sand using a lower grit paper (say 80 grit) and again using 120 grit. I’m obsessed with my orbital sander and it got the job done fast, but an old-fashioned sanding block also does the trick.
The application of the Liming White Stain and Varnish is the easiest part. Dust off the timber, stir your stain and apply with a brush or roller. Let it dry overnight and sand lightly with 240 grit paper. Apply another coat and once it’s dry you are ready to attach it to the laptop stand. Take out the pre-existing glass on the stand and drill four holes in to the metal tabs. Use four 50mm screws to attach the timber to the stand. The Feast Watson ‘How to Guide’ and Video is so simple to follow and has instructions on how to apply other interior furniture stains and varnishes. The Black Japan Stain is stunning too. The great thing is that the guide also gives you alternatives if you don’t have the recommended power tools handy.
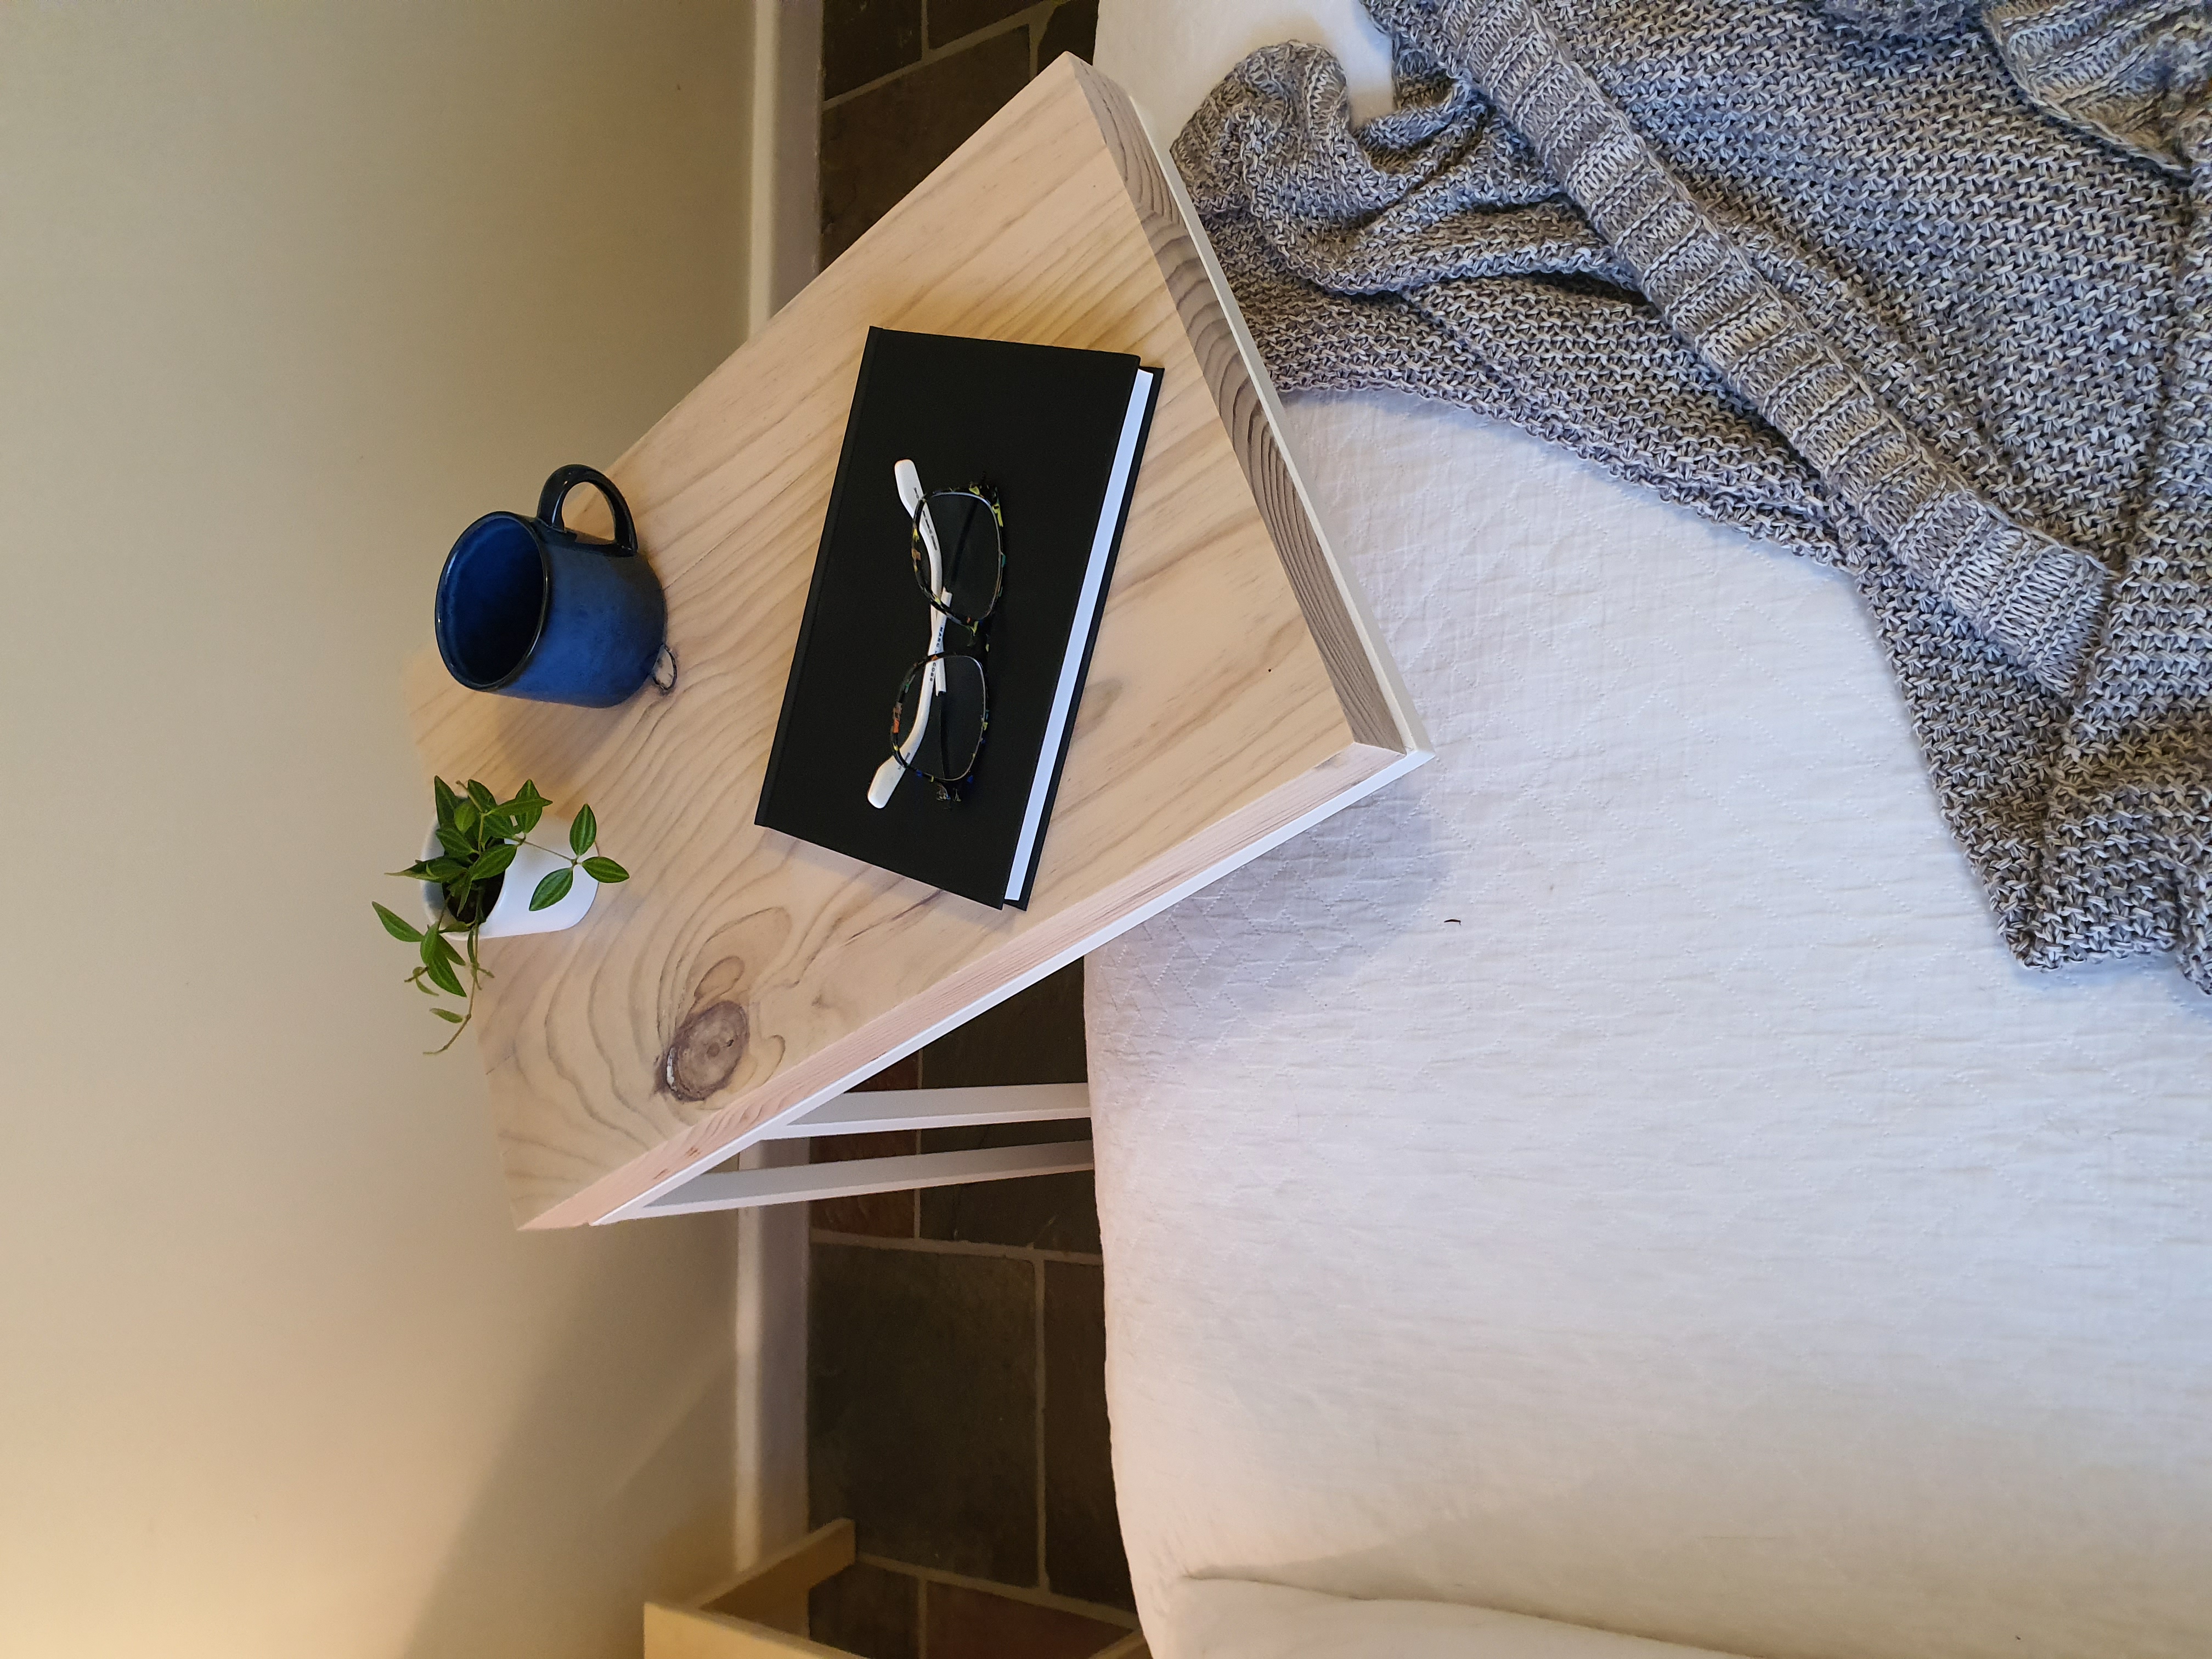
I’ve been using the laptop table as my main work table for a while now and the only problem is that everyone else in my family keep stealing it because it’s so handy. It looks amazing in the lounge room and fits my laptop and cup of tea on it. I’ve had so many comments from friends about how stylish and bespoke it looks. It’s really saved my back and still allows me to work anywhere in the home, including outside on the deck, which I love.

SUGGESTED PRODUCTS


System.IO.IOException: The process cannot access the file 'C:\local\Temp\ExamineIndexes\87b109f06c75ad52504281172cd4c66b\ContentIndex\_15.cfs' because it is being used by another process.
   at System.IO.FileSystem.DeleteFile(String fullPath)
   at System.IO.FileInfo.Delete()
   at Examine.Lucene.Directories.SyncedFileSystemDirectoryFactory.ClearDirectory(DirectoryInfo directoryInfo)
   at Examine.Lucene.Directories.SyncedFileSystemDirectoryFactory.SyncIndex(IndexWriter sourceIndexWriter, Boolean forceUnlock, String indexName, DirectoryInfo destinationDirectory, DirectoryInfo tempDir)
   at Examine.Lucene.Directories.SyncedFileSystemDirectoryFactory.TryCreateDirectory(LuceneIndex luceneIndex, Boolean forceUnlock, Directory& directory)
   at Examine.Lucene.Directories.SyncedFileSystemDirectoryFactory.CreateDirectory(LuceneIndex luceneIndex, Boolean forceUnlock)
   at Examine.Lucene.Directories.DirectoryFactoryBase.Examine.Lucene.Directories.IDirectoryFactory.CreateDirectory(LuceneIndex luceneIndex, Boolean forceUnlock)
   at Umbraco.Cms.Infrastructure.Examine.ConfigurationEnabledDirectoryFactory.CreateDirectory(LuceneIndex luceneIndex, Boolean forceUnlock)
   at Examine.Lucene.Directories.DirectoryFactoryBase.Examine.Lucene.Directories.IDirectoryFactory.CreateDirectory(LuceneIndex luceneIndex, Boolean forceUnlock)
   at Examine.Lucene.Providers.LuceneIndex.<>c__DisplayClass1_0.<.ctor>b__0()
   at System.Lazy`1.ViaFactory(LazyThreadSafetyMode mode)
   at System.Lazy`1.ExecutionAndPublication(LazyHelper executionAndPublication, Boolean useDefaultConstructor)
   at System.Lazy`1.CreateValue()
   at System.Lazy`1.get_Value()
   at Examine.Lucene.Providers.LuceneIndex.GetLuceneDirectory()
   at Examine.Lucene.Providers.LuceneIndex.IndexExistsImpl()
   at Examine.Lucene.Providers.LuceneIndex.IndexExists()
   at Examine.Lucene.Providers.LuceneIndex.EnsureIndex(Boolean forceOverwrite)
   at Examine.Lucene.Providers.LuceneIndex.get_IndexWriter()
   at Examine.Lucene.Providers.LuceneIndex.CreateSearcher()
   at System.Lazy`1.ViaFactory(LazyThreadSafetyMode mode)
--- End of stack trace from previous location ---
   at System.Lazy`1.CreateValue()
   at Examine.Lucene.Providers.LuceneIndex.get_Searcher()
   at DuluxGroup.CMSWeb.Services.ContentIndexQueryService.GetContentsBySearchRequestModel(String indexName, String[] includeNodeTypeAliases, SearchRequestModel searchRequestModel) in D:\a\1\s\src\DuluxGroup.CMSWeb\Services\ContentIndexQueryService.cs:line 79
   at DuluxGroup.CMSWeb.Services.ItemListingService.GetContentsByStarterNodeAndCriteria(ItemListingSource itemListingSource, IEnumerable`1 criteria) in D:\a\1\s\src\DuluxGroup.CMSWeb\Services\ItemListingService.cs:line 244
   at DuluxGroup.CMSWeb.Services.ItemListingService.GetContentInfoModelsFromChildNode(ItemListingSource itemListingSource, Int32 numberOfDisplayItems) in D:\a\1\s\src\DuluxGroup.CMSWeb\Services\ItemListingService.cs:line 140
   at DuluxGroup.CMSWeb.Services.ItemListingService.GetSortedAndOrderedContentInfos(ItemListingSource itemListingSource, Int32 numberOfDisplayItems) in D:\a\1\s\src\DuluxGroup.CMSWeb\Services\ItemListingService.cs:line 114
   at DuluxGroup.CMSWeb.Services.ItemListingService.GetViewModel(ItemListing itemListing) in D:\a\1\s\src\DuluxGroup.CMSWeb\Services\ItemListingService.cs:line 47
   at AspNetCore.Views_Partials_grid_editors_DocTypeGridEditor_itemListing.ExecuteAsync()
   at Microsoft.AspNetCore.Mvc.Razor.RazorView.RenderPageCoreAsync(IRazorPage page, ViewContext context)
   at Microsoft.AspNetCore.Mvc.Razor.RazorView.RenderPageAsync(IRazorPage page, ViewContext context, Boolean invokeViewStarts)
   at Microsoft.AspNetCore.Mvc.Razor.RazorView.RenderAsync(ViewContext context)
   at Microsoft.AspNetCore.Mvc.ViewComponents.ViewViewComponentResult.ExecuteAsync(ViewComponentContext context)
   at Microsoft.AspNetCore.Mvc.ViewComponents.DefaultViewComponentInvoker.InvokeAsync(ViewComponentContext context)
   at Microsoft.AspNetCore.Mvc.ViewComponents.DefaultViewComponentHelper.InvokeCoreAsync(ViewComponentDescriptor descriptor, Object arguments)
   at Our.Umbraco.DocTypeGridEditor.Helpers.DocTypeGridEditorHelper.RenderDocTypeGridEditorItem(IViewComponentHelper helper, IHtmlHelper htmlHelper, IPublishedElement content, String editorAlias, String viewPath, String previewViewPath, Boolean isPreview) in D:\a\1\s\src\Our.Umbraco.DocTypeGridEditor\Helpers\DocTypeGridEditorHelper.cs:line 254
   at Our.Umbraco.DocTypeGridEditor.Helpers.DocTypeGridEditorHelper.RenderDocTypeGridEditorItem(IViewComponentHelper helper, IHtmlHelper htmlHelper, Object model) in D:\a\1\s\src\Our.Umbraco.DocTypeGridEditor\Helpers\DocTypeGridEditorHelper.cs:line 222
   at CallSite.Target(Closure, CallSite, Object)
   at AspNetCore.app_plugins_doctypegrideditor_render_doctypegrideditor.ExecuteAsync() in C:\home\site\wwwroot\app_plugins\doctypegrideditor\render\doctypegrideditor.cshtml:line 4
   at Microsoft.AspNetCore.Mvc.Razor.RazorView.RenderPageCoreAsync(IRazorPage page, ViewContext context)
   at Microsoft.AspNetCore.Mvc.Razor.RazorView.RenderPageAsync(IRazorPage page, ViewContext context, Boolean invokeViewStarts)
   at Microsoft.AspNetCore.Mvc.Razor.RazorView.RenderAsync(ViewContext context)
   at Microsoft.AspNetCore.Mvc.ViewFeatures.HtmlHelper.RenderPartialCoreAsync(String partialViewName, Object model, ViewDataDictionary viewData, TextWriter writer)
   at Microsoft.AspNetCore.Mvc.ViewFeatures.HtmlHelper.PartialAsync(String partialViewName, Object model, ViewDataDictionary viewData)
   at AspNetCore.Views_Partials_grid_editors_base.ExecuteAsync() in C:\home\site\wwwroot\Views\Partials\grid\editors\base.cshtml:line 6
