How to ReLove- Update your dated Timber Panel Wall with Liming White
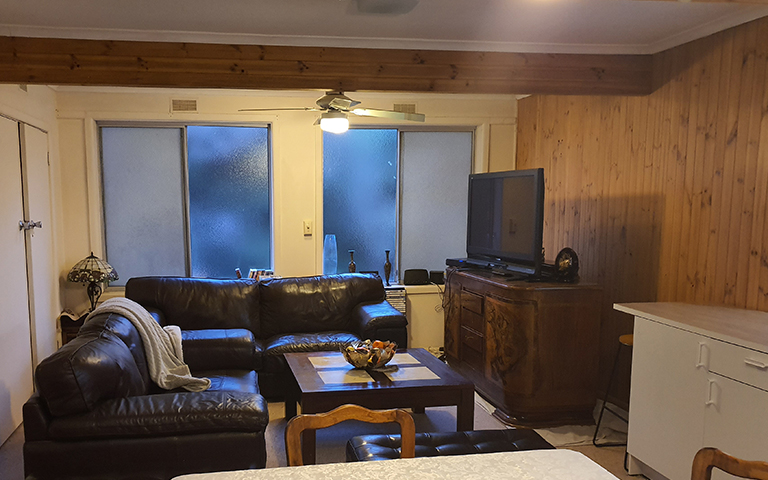
Just bought your first home? An investment? Or finally moved into your dream home, but it needs a little ReLovin’? No doubt as you trawl the real-estate ads and visit open for inspections you have noticed those old-fashioned timber panel walls that were the height of style in the 60’s. Known as ‘the good room’ it’s against that timber panelling that your grandma affectionately keeps her spoon collection locked in a glass cabinet, right? But now that this house is yours to style ‘the good room’ needs some transforming and that icky timber panelling needs a good old update. Rather than ripping the panelling off, which can be costly and difficult- try this How to ReLove project, coating it in the stunning and elegant Liming White.
Wall panelling has seen a recent surge in popularity in the last few years and has certainly endured as a style that can be adapted to suit both modern and traditional homes. Whether your panelling goes all the way up the wall or only covers the lower wall, colour choice is everything. The stain of the timber will dictate what era that panelling exists in and most commonly a pre-loved home will have a bright yellow stain hangover from recent decades. But don’t worry, it’s relatively easy to update the look of your wall panelling and bring it back to life with a coat of modern Liming White from the Feast Watson’s Timber Floor Stain & Varnish range.
Liming White is a fresh and elegant choice for your home. It will instantly make any room look bigger and brighter, adding a sophisticated and soft touch to any room. This makes it perfect for indoor spaces, such as lounge rooms, dining rooms and bedrooms. It’s a water-based stain and varnish, meaning that it’s quick to dry, so you can complete the project over a single day. Made as a timber floor finish, this means the product is durable and provides excellent protection for both floors and walls.
Because you want the colour to be perfect, Liming White is fully customisable in tone. Simply apply as many coats as you want to get the desired brightness on the wall. For example, one coat will give you a soft milky white colour, while two or three coats will leave a whiter, brighter finish. Either way, the natural grain of your timber will remain visible because Liming White is semi-transparent. It takes literally one-step to achieve a Liming White finish on bare timber, but if you plan on updating old panelling, preparing the surface is important. Other benefits of a water based finish are that it won’t yellow again over time. Meaning that icky yellow finish is gone for good!
What you need:
- A dated wood panelled wall to transform
- Feast Watson Timber Floor Stain & Varnish Liming White (Grab a pack size appropriate for your wall. It’s about 8m² per litre coverage and comes in pack sizes of 4 or 10 litres)
- Paint brush
- Paint roller (with microfiber nap)
- Roller tray
- Stirrer
- Drop sheets (to cover your floor and furniture)
- Sandpaper discs for your orbital sander and some extra hand sandpaper and blocks for in between coats
- Old cloths
- A step ladder for the high spots
- Protective gear for you
Tools you need (adults use only!):
- Orbital sander
Step One: Snap it!
This is going to be quite the transformation, so make sure you take a ‘before’ pic to compare once it’s done.
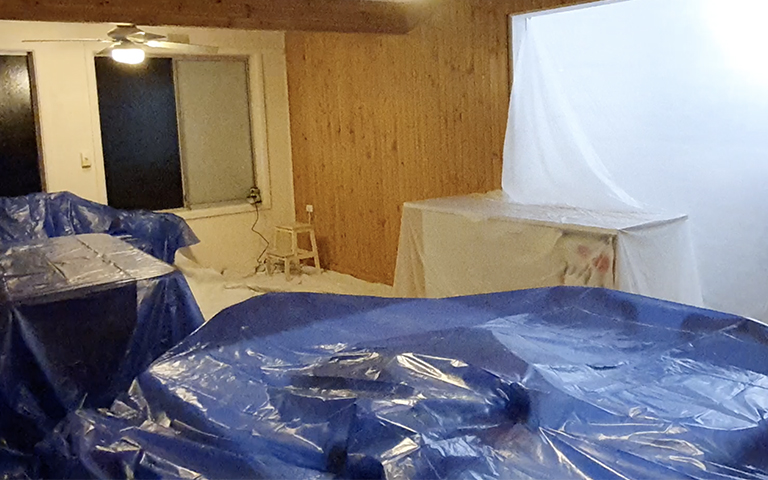
Step Two: Prep it!
As with all timber staining and painting, preparation is key.
Remove any furniture, paintings and fixtures from the dated wood panelling. Cover your furniture and existing floor with drop sheets. This is mostly because the sanding dust can go everywhere.
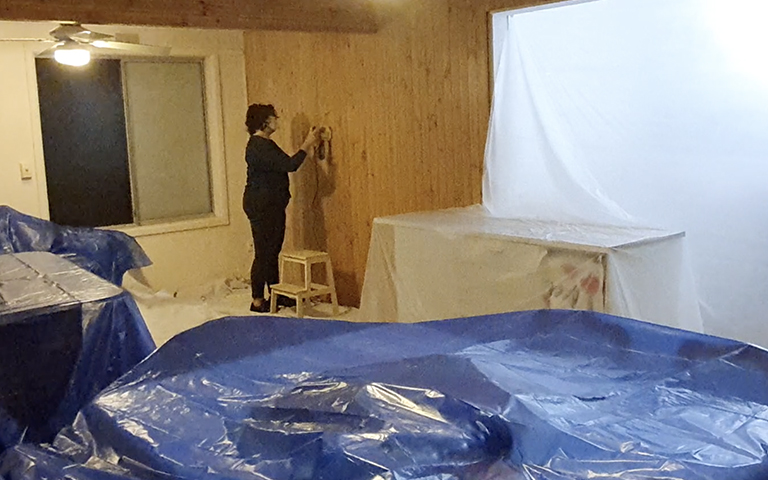
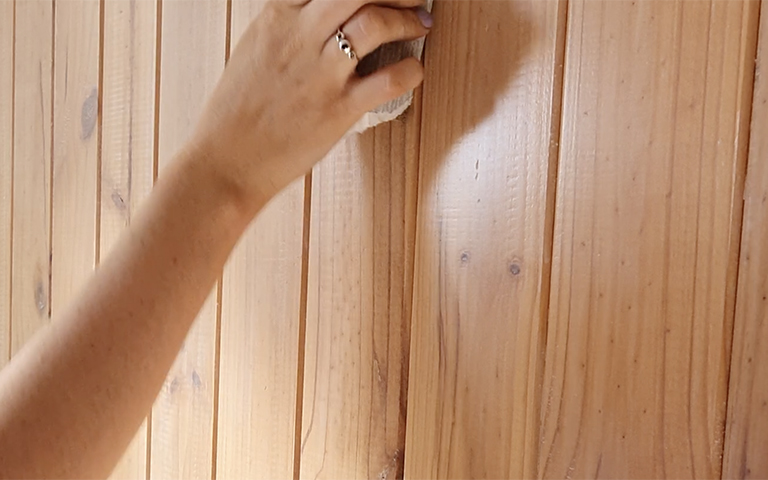
Step Three: Sand it!
Sand that icky yellow varnish back. Using an orbital sander first use 80 grit and then on 120 grit to get a smooth finish. You will need to sand back to bare timber.
When you are done dust off with a clean cloth and then wipe off any dust with a damp cloth.
Step Four: Stir it!
Stir your pack of Feast Watson Timber Floor Stain & Varnish Liming White really well. Use a stirring stick, scrape the bottom of the can. Keep mixing until there are no chunks on the bottom and it’s all mixed in.

Floor Finish has been renamed into Timber Floor Stain & Varnish
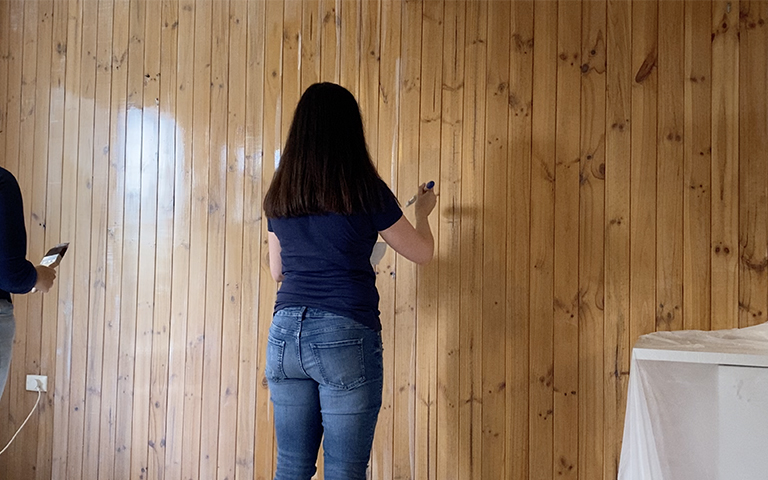
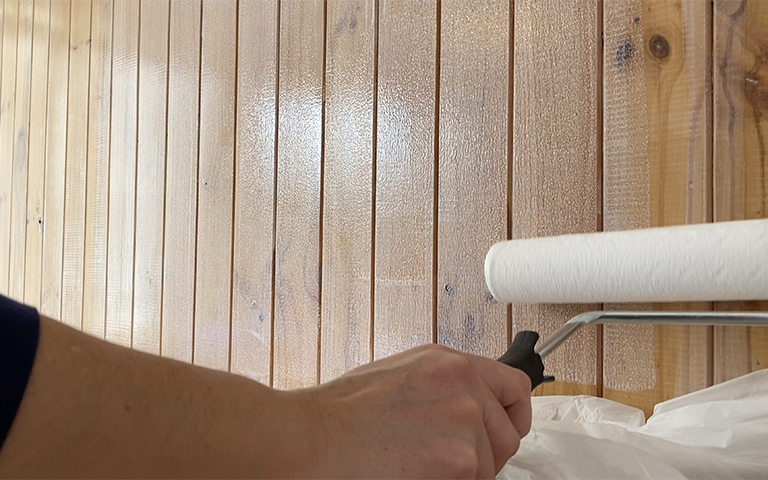
Step Five: Coat it!
You’re about to see some incredible results, which is exciting! Pour the Timber Floor Stain & Varnish Liming White into a rolling tray. Cut in along the starting edge and the top and bottom of 2-3 boards at a time. Then use a roller with a microfiber nap and roll onto the wall 2-3 boards at a time.
Remember, Timber Floor Stain & Varnish Liming White is designed to dry within 2 to 3 hours, therefore you don’t want to rush and roll or paint the whole wall at once. A good tip is to only cut in a few boards at a time, followed by painting a few boards at a time. This will ensure you don’t get lap marks on the panelling. Completing this step slowly and carefully will make a big difference to your finished look.
To get the best finish, tip off with a dry brush by running your brush gently across the surface. Pay particular attention to the gaps in the panelling and aim for a smooth and even finish.
Let it dry. It will take about 2 to 3 hours to dry fully. Touch the surface in an inconspicuous area to feel if it is fully dry before sanding.
Step Six: Sand it!
Use 120 grit sandpaper to hand sand lightly after your first coat. This will give you the smoothest finish and should also be completed in between coats.
When you are done dust off with a clean cloth and then wipe off any dust with a damp cloth.
Step Seven: Coat again!
If you want a more intense white colour, recoat by following Steps Five and Six. You can coat as many times as you like, but two to three will give you the best results, while maintaining some transparency to see the natural grain in the timber.
Remember to cut in, roll on and tip off with care and allow 2 to 3 hours for drying in between coats.
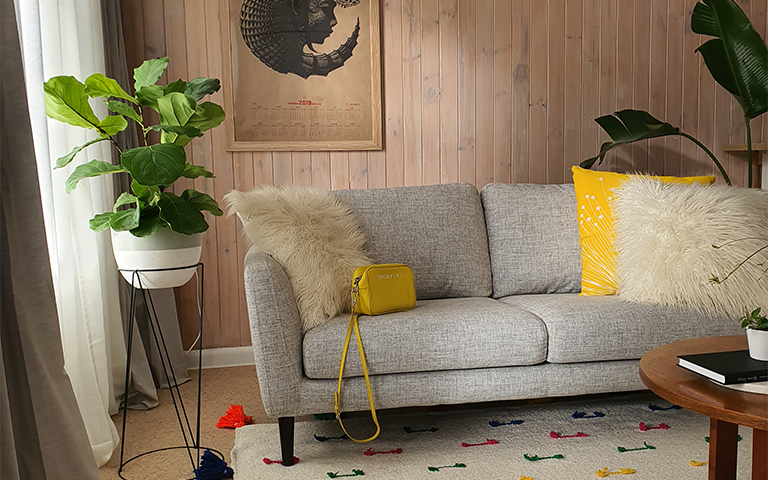
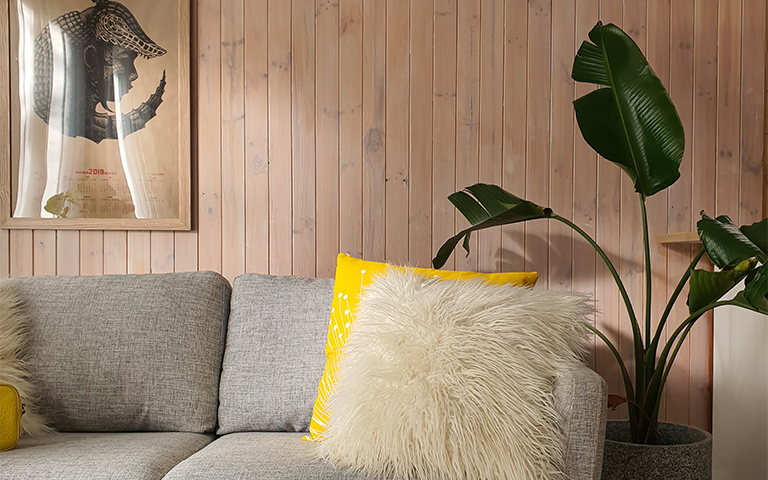
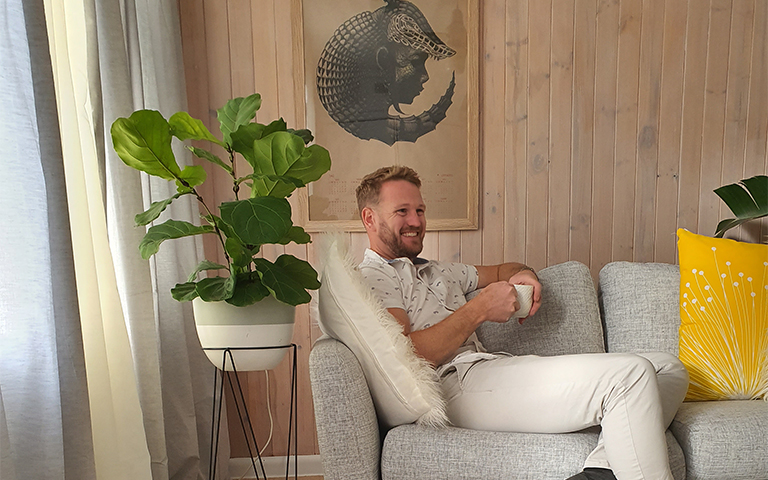
Step Eight: Snap it!
Restyle your space by popping your furniture, fittings and paining’s back.
Take an ‘after’ photo and compare it to before.
Finally, feel free to relax and enjoy the amazing space you have created.
You can maintain the look by wiping your wall clean with a damp cloth from time to time. You can sand and recoat the panelling any time you feel like an update or refresh.
What an amazing way to transform a room. Now that you know How to ReLove your dated wood panelling you can enjoy this space for years to come. ReLoving your existing wood panelling will also save you time, money and effort in the long run. The Liming White colour adds instant elegance and modernises even the oldest wall, bringing it straight back to life. The room becomes spacious and bright, while maintaining the natural character you can only achieve with a wood feature.
How To video
Do you find it easier to watch the video? We do too. Take a look at the video here if you would like to see it in action.
Floor Finish has been renamed into Timber Floor Stain & Varnish
Suggested For You


