IKEA laptop table hack to match your style.
There is no getting around it, the freedom and flexibility to use your laptop anywhere around your home or office has become increasingly important. With many people choosing to work from home and the decreasing use of chunky personalised computers, your laptop is essential and probably one of the most used items in your day. Even in office spaces, hot-desking is the latest innovation, as we seek flexibility to move wherever we feel most comfortable and inspired.
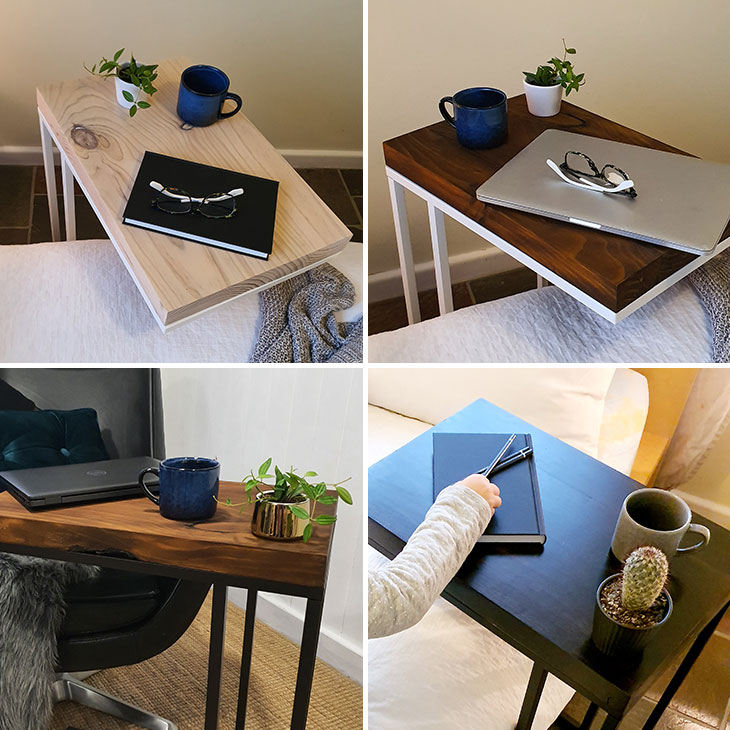
Having your own portable laptop table is a simple solution that will help you achieve a flexible and practical workspace anywhere you choose. However a quick search for ‘portable laptop tables’ might leave you feeling pretty uninspired as you are met with a sea of plastic, disposable furniture that you know won’t suit your home styling dreams. If you crave the classic character of a timber laptop stand that fits effortlessly into any home décor, you should consider this interior timber project. Building your own laptop table is easier than you may think and Feast Watson’s range of Stain and Varnish allows you to select the perfect colour and finish, tailored to your style and existing space.
First, decide on your favourite Feast Watson Stain and Varnish, designed specifically for interior timber. The colour range is extensive with classic and modern timber colours, including: Black Japan, Liming White and Oak stain with Matt Varnish. The stains allow you to tailor your timber look to the feel of your home or office and the selection means you will easily find a colour to suit your taste. Feast Watson wood finishing products are known for their reliability and durability, meaning you will achieve a quality finish every time. Most timber finishes in the range are a one-step Stain and Varnish, this will mean you don’t have to coat with varnish separately unless you choose. Once you have selected your favourite colour, you are ready to get your materials together.
What you need:
- 1 x Vittsjo Laptop stand in either black or white (your choice and you’ll find these at Ikea)
- 1.5m of 290mm x 45mm Pine (you can choose another timber if you prefer, but remember Feast Watson’s Stain and Varnish will provide an excellent finish to any timber)
- Your favourite Feast Watson coating
- Biscuits or Dowels
- 350mm clamps
- Paint Brush or mini paint roller
- Wood Glue
Tools you need:
(Power tools make your job easier, but can be replaced with hand tools if needed)
- A drop saw or Hand Saw
- A Biscuit Saw or Drill Bit
- A table saw or Hand Saw
- Sander or Sand paper
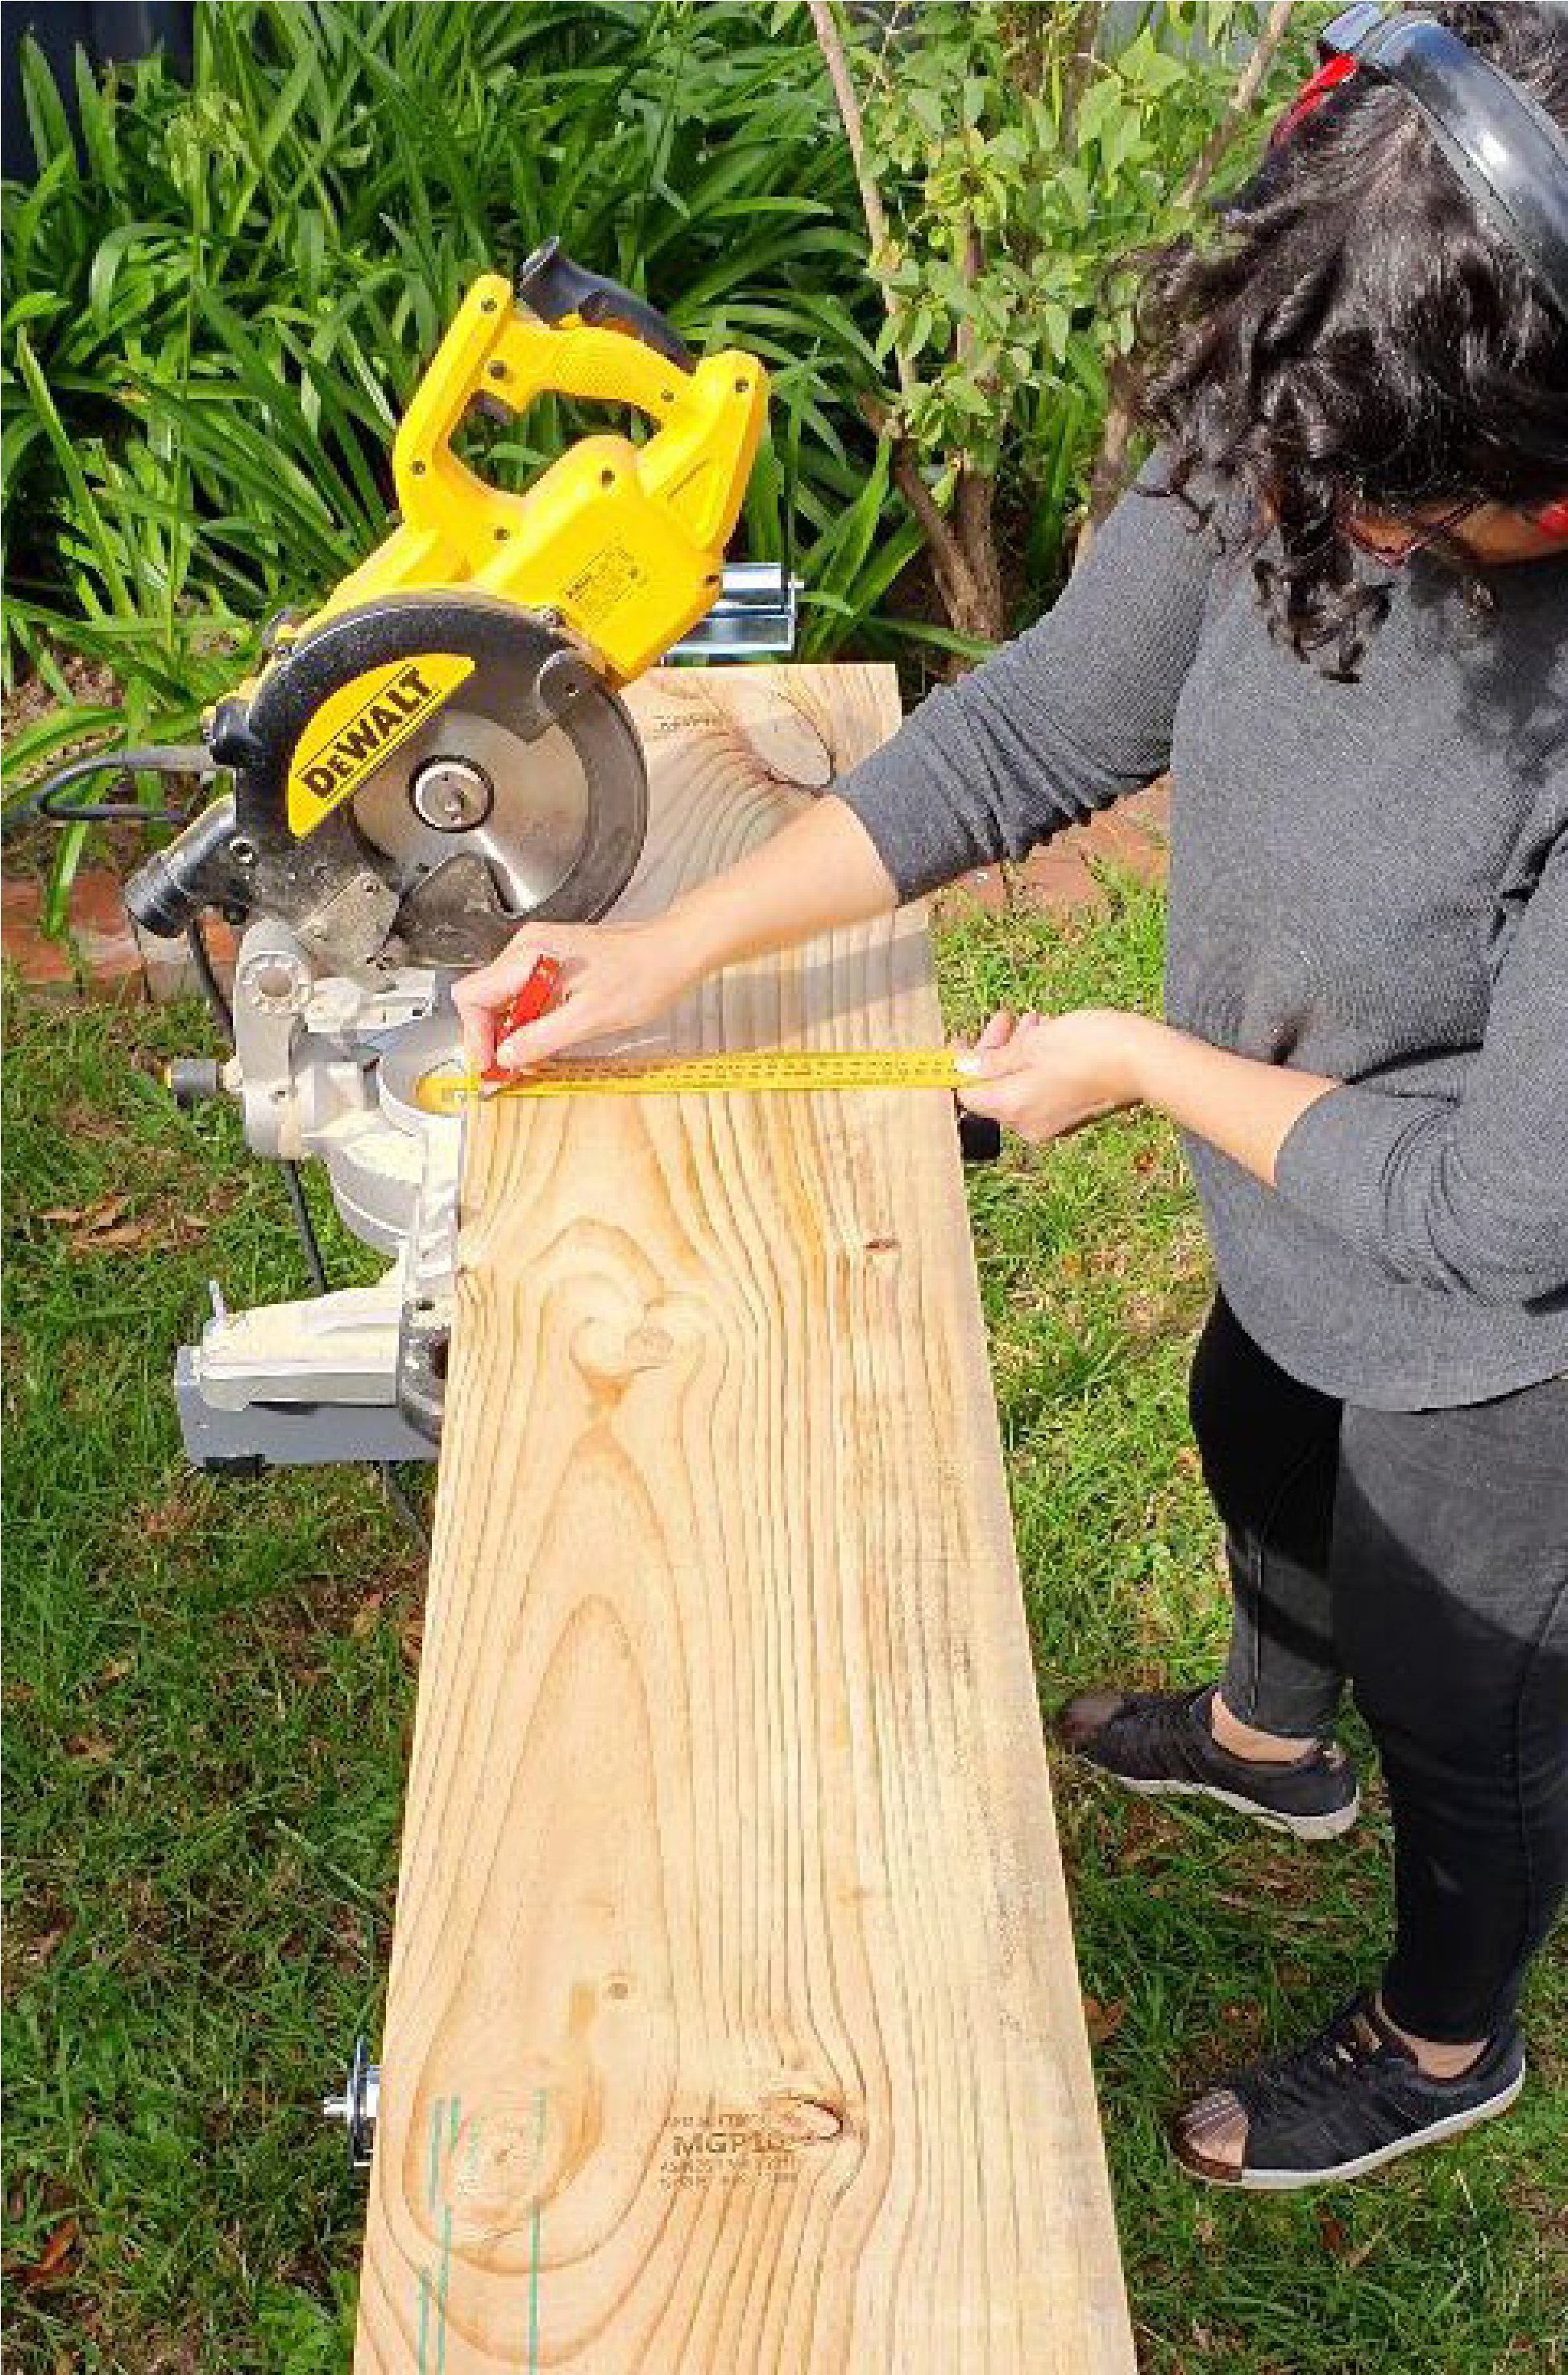
Step One: Mark it! Cut it!
The top of the stand is 350mm x 550mm, so you need to cut your timber according to these lengths. However you may choose to combine two pieces of wood (for example if you are using off cuts or want to keep a natural knot in the timber you have chosen).
Use your drop saw or hand saw to cut the wood to size.
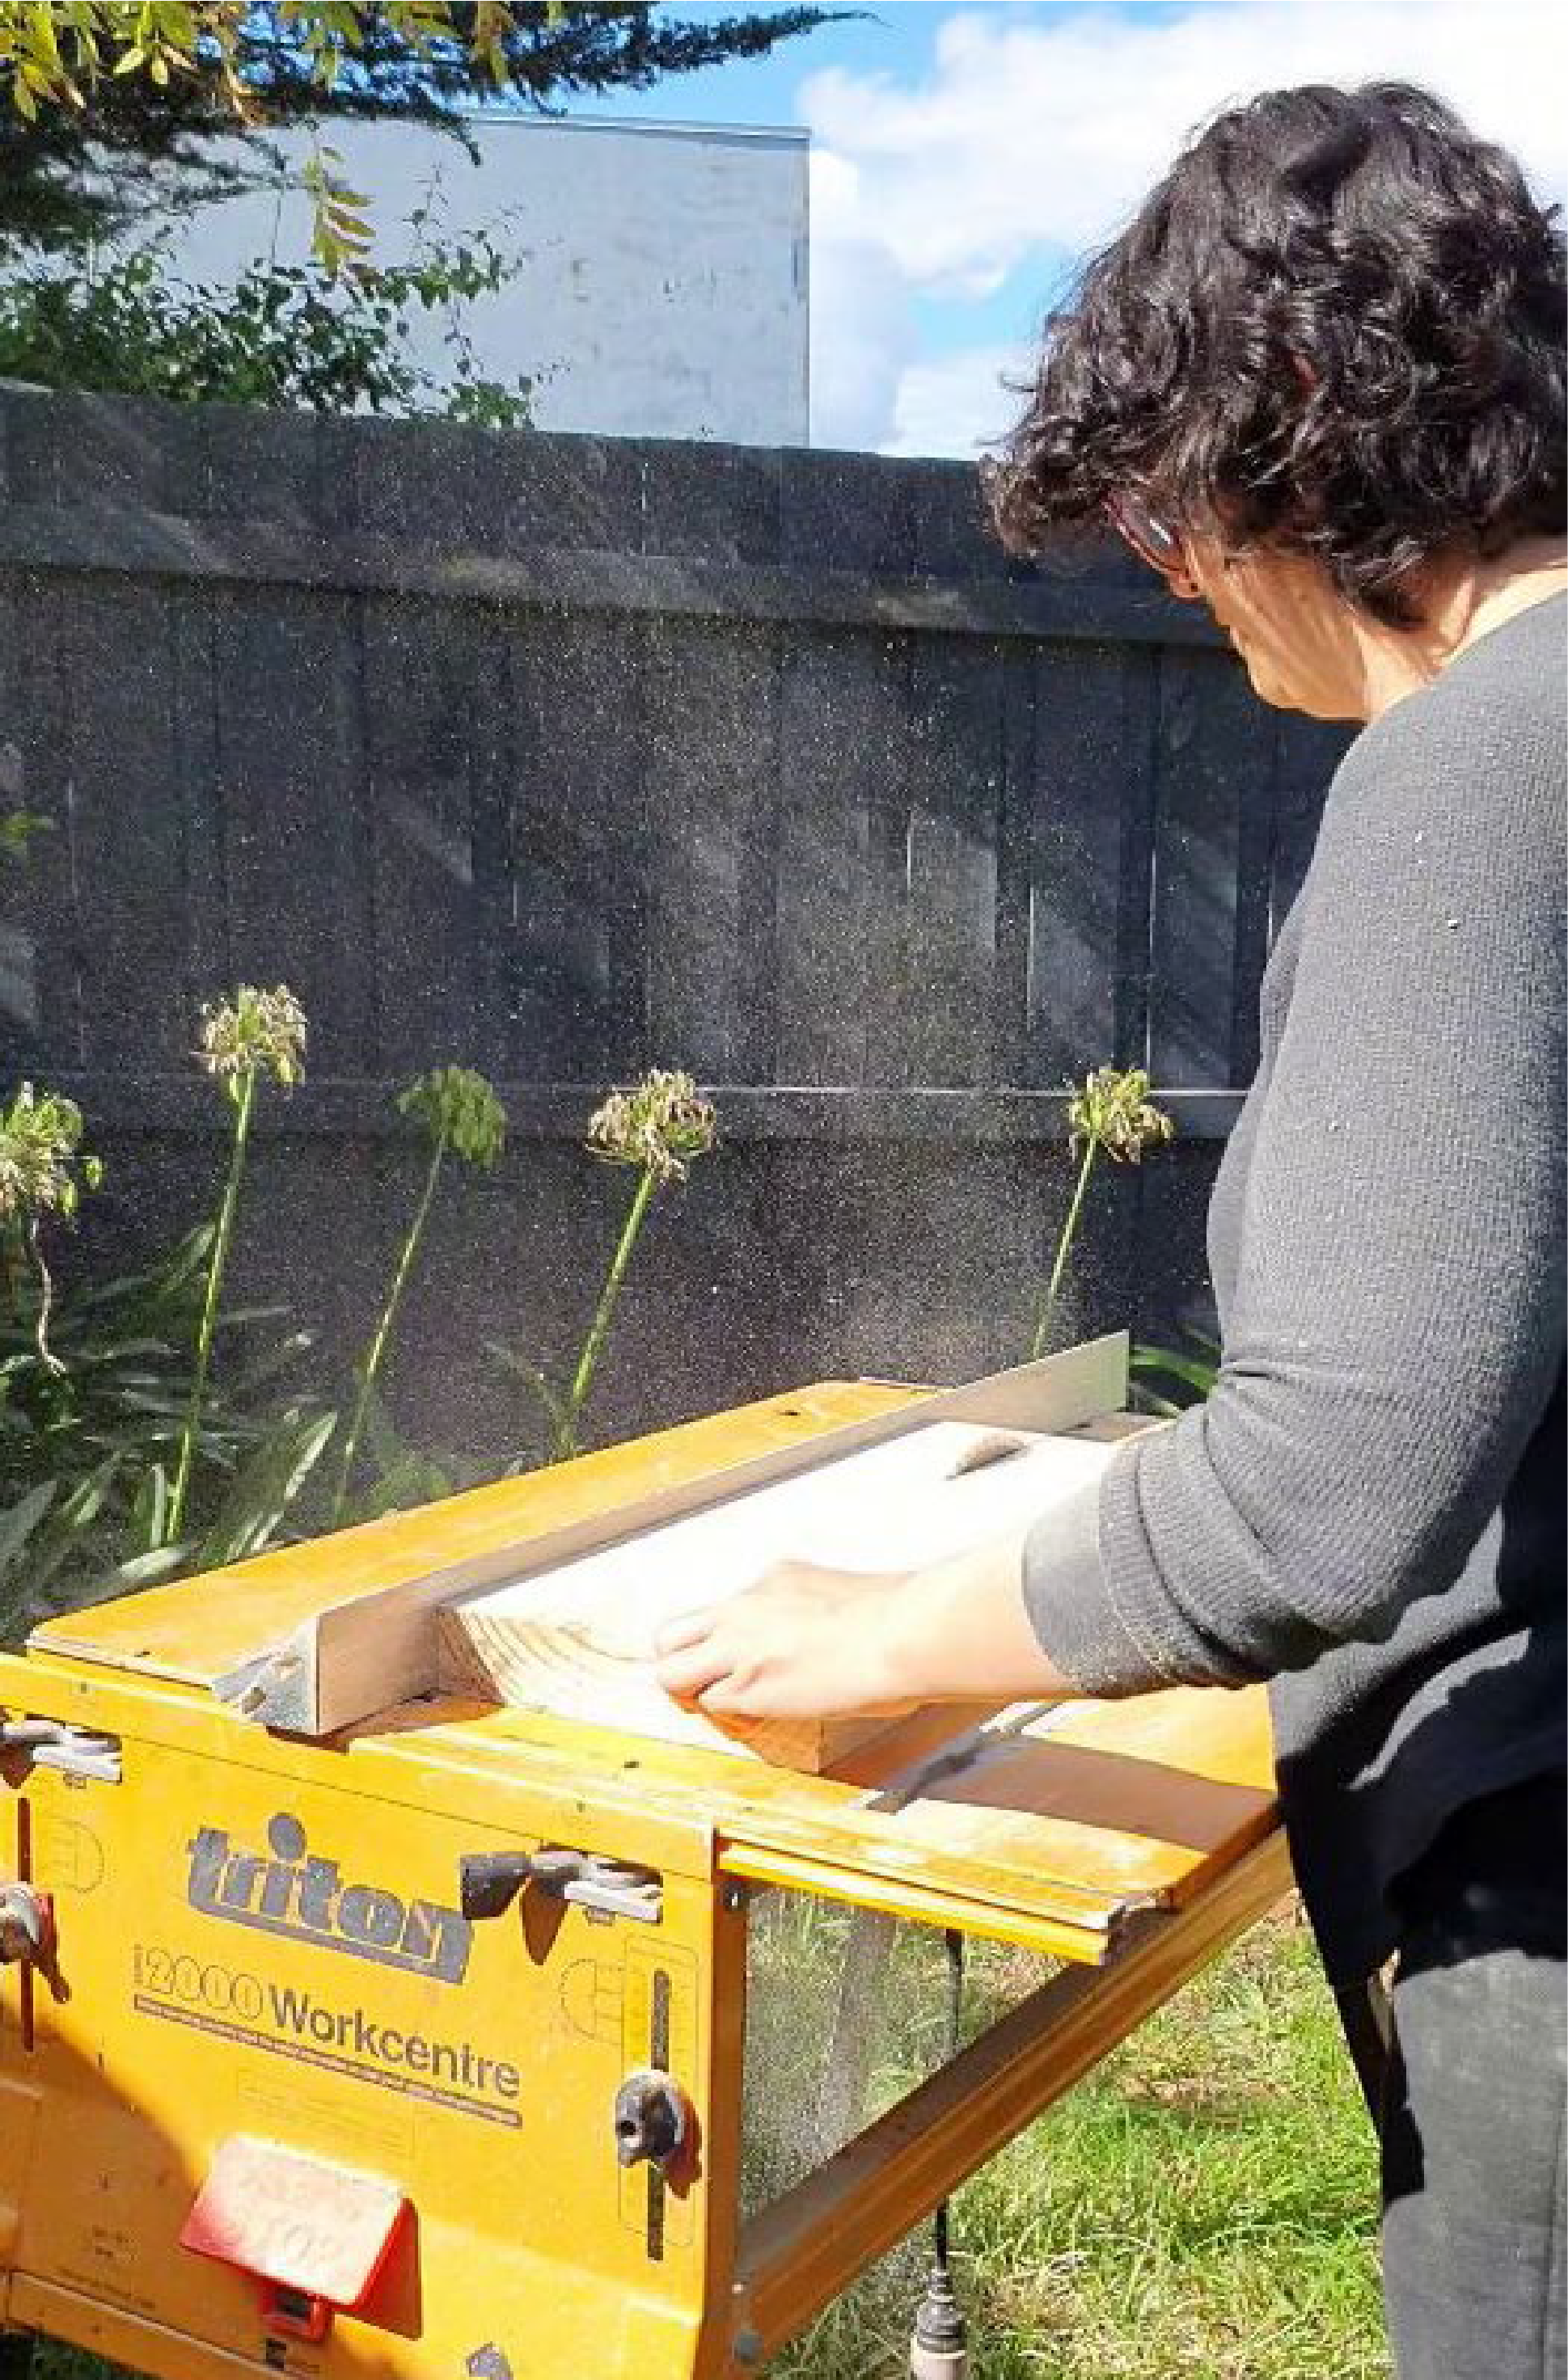
Step Two: Cut It!
Square off the edges using a table saw or hand saw.
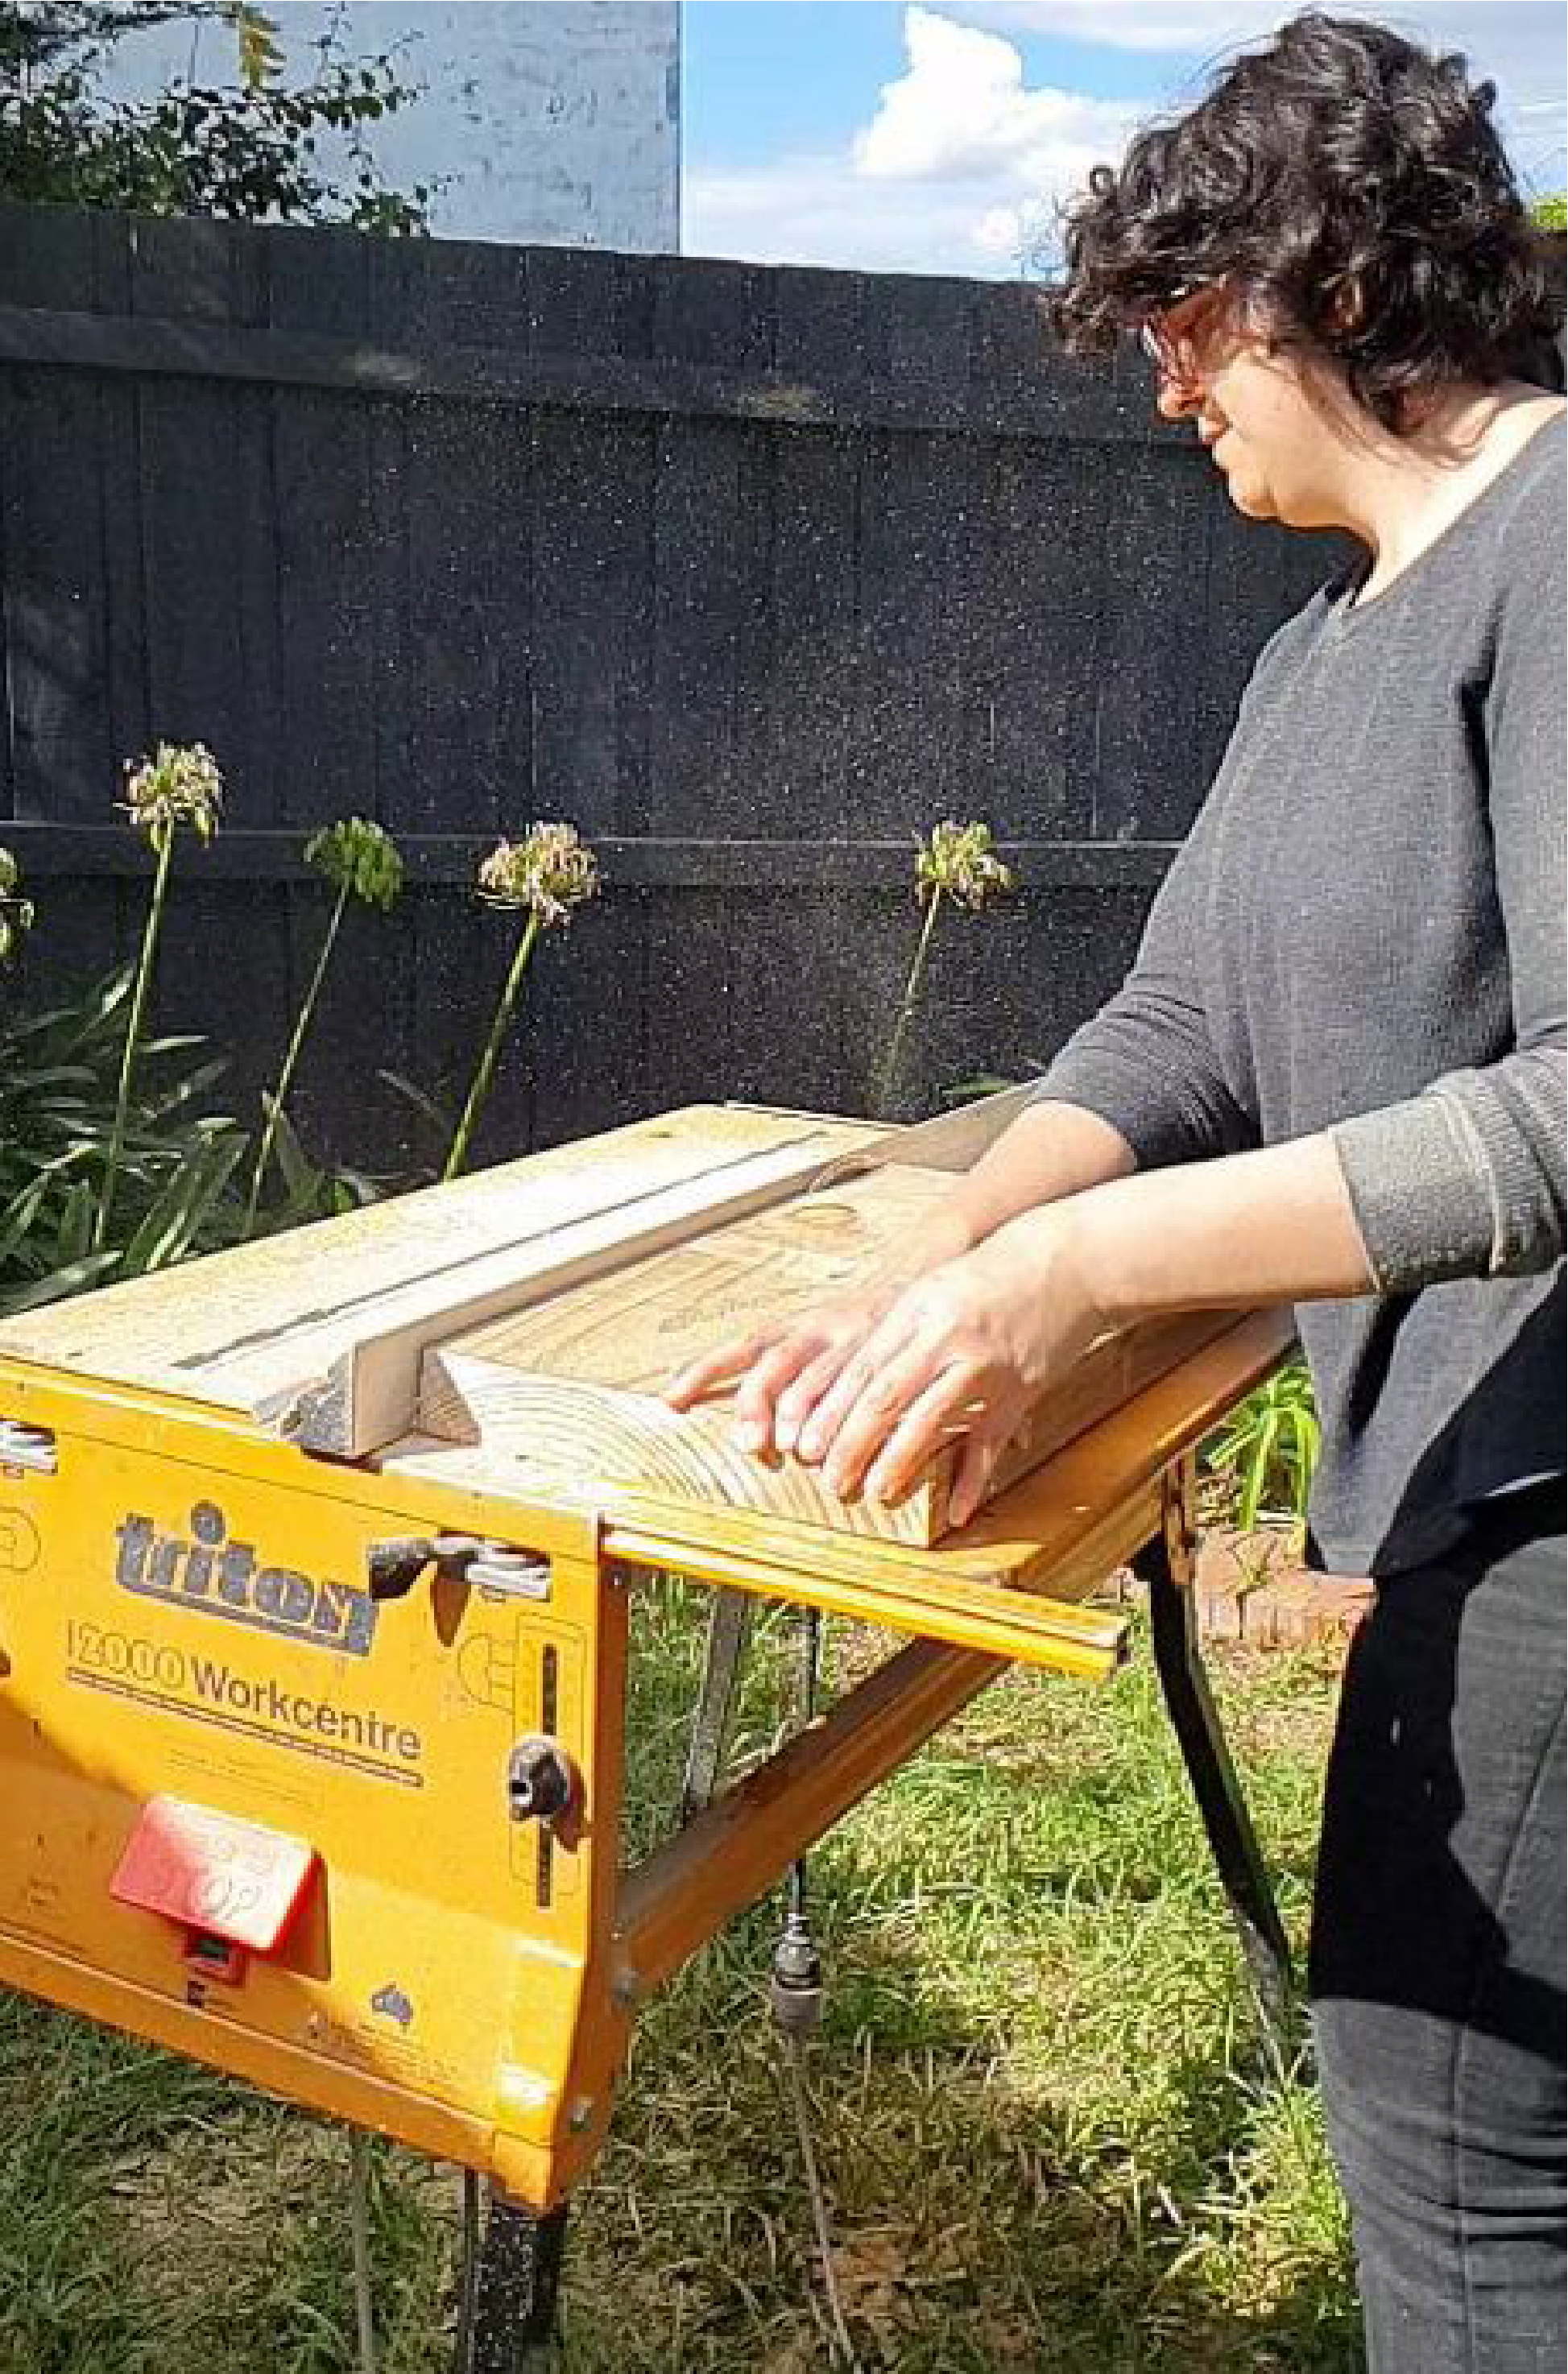
Step Three: Cut it!
If you used two separate pieces of timber, you will need to square off the edges of each piece using a table saw or hand saw.
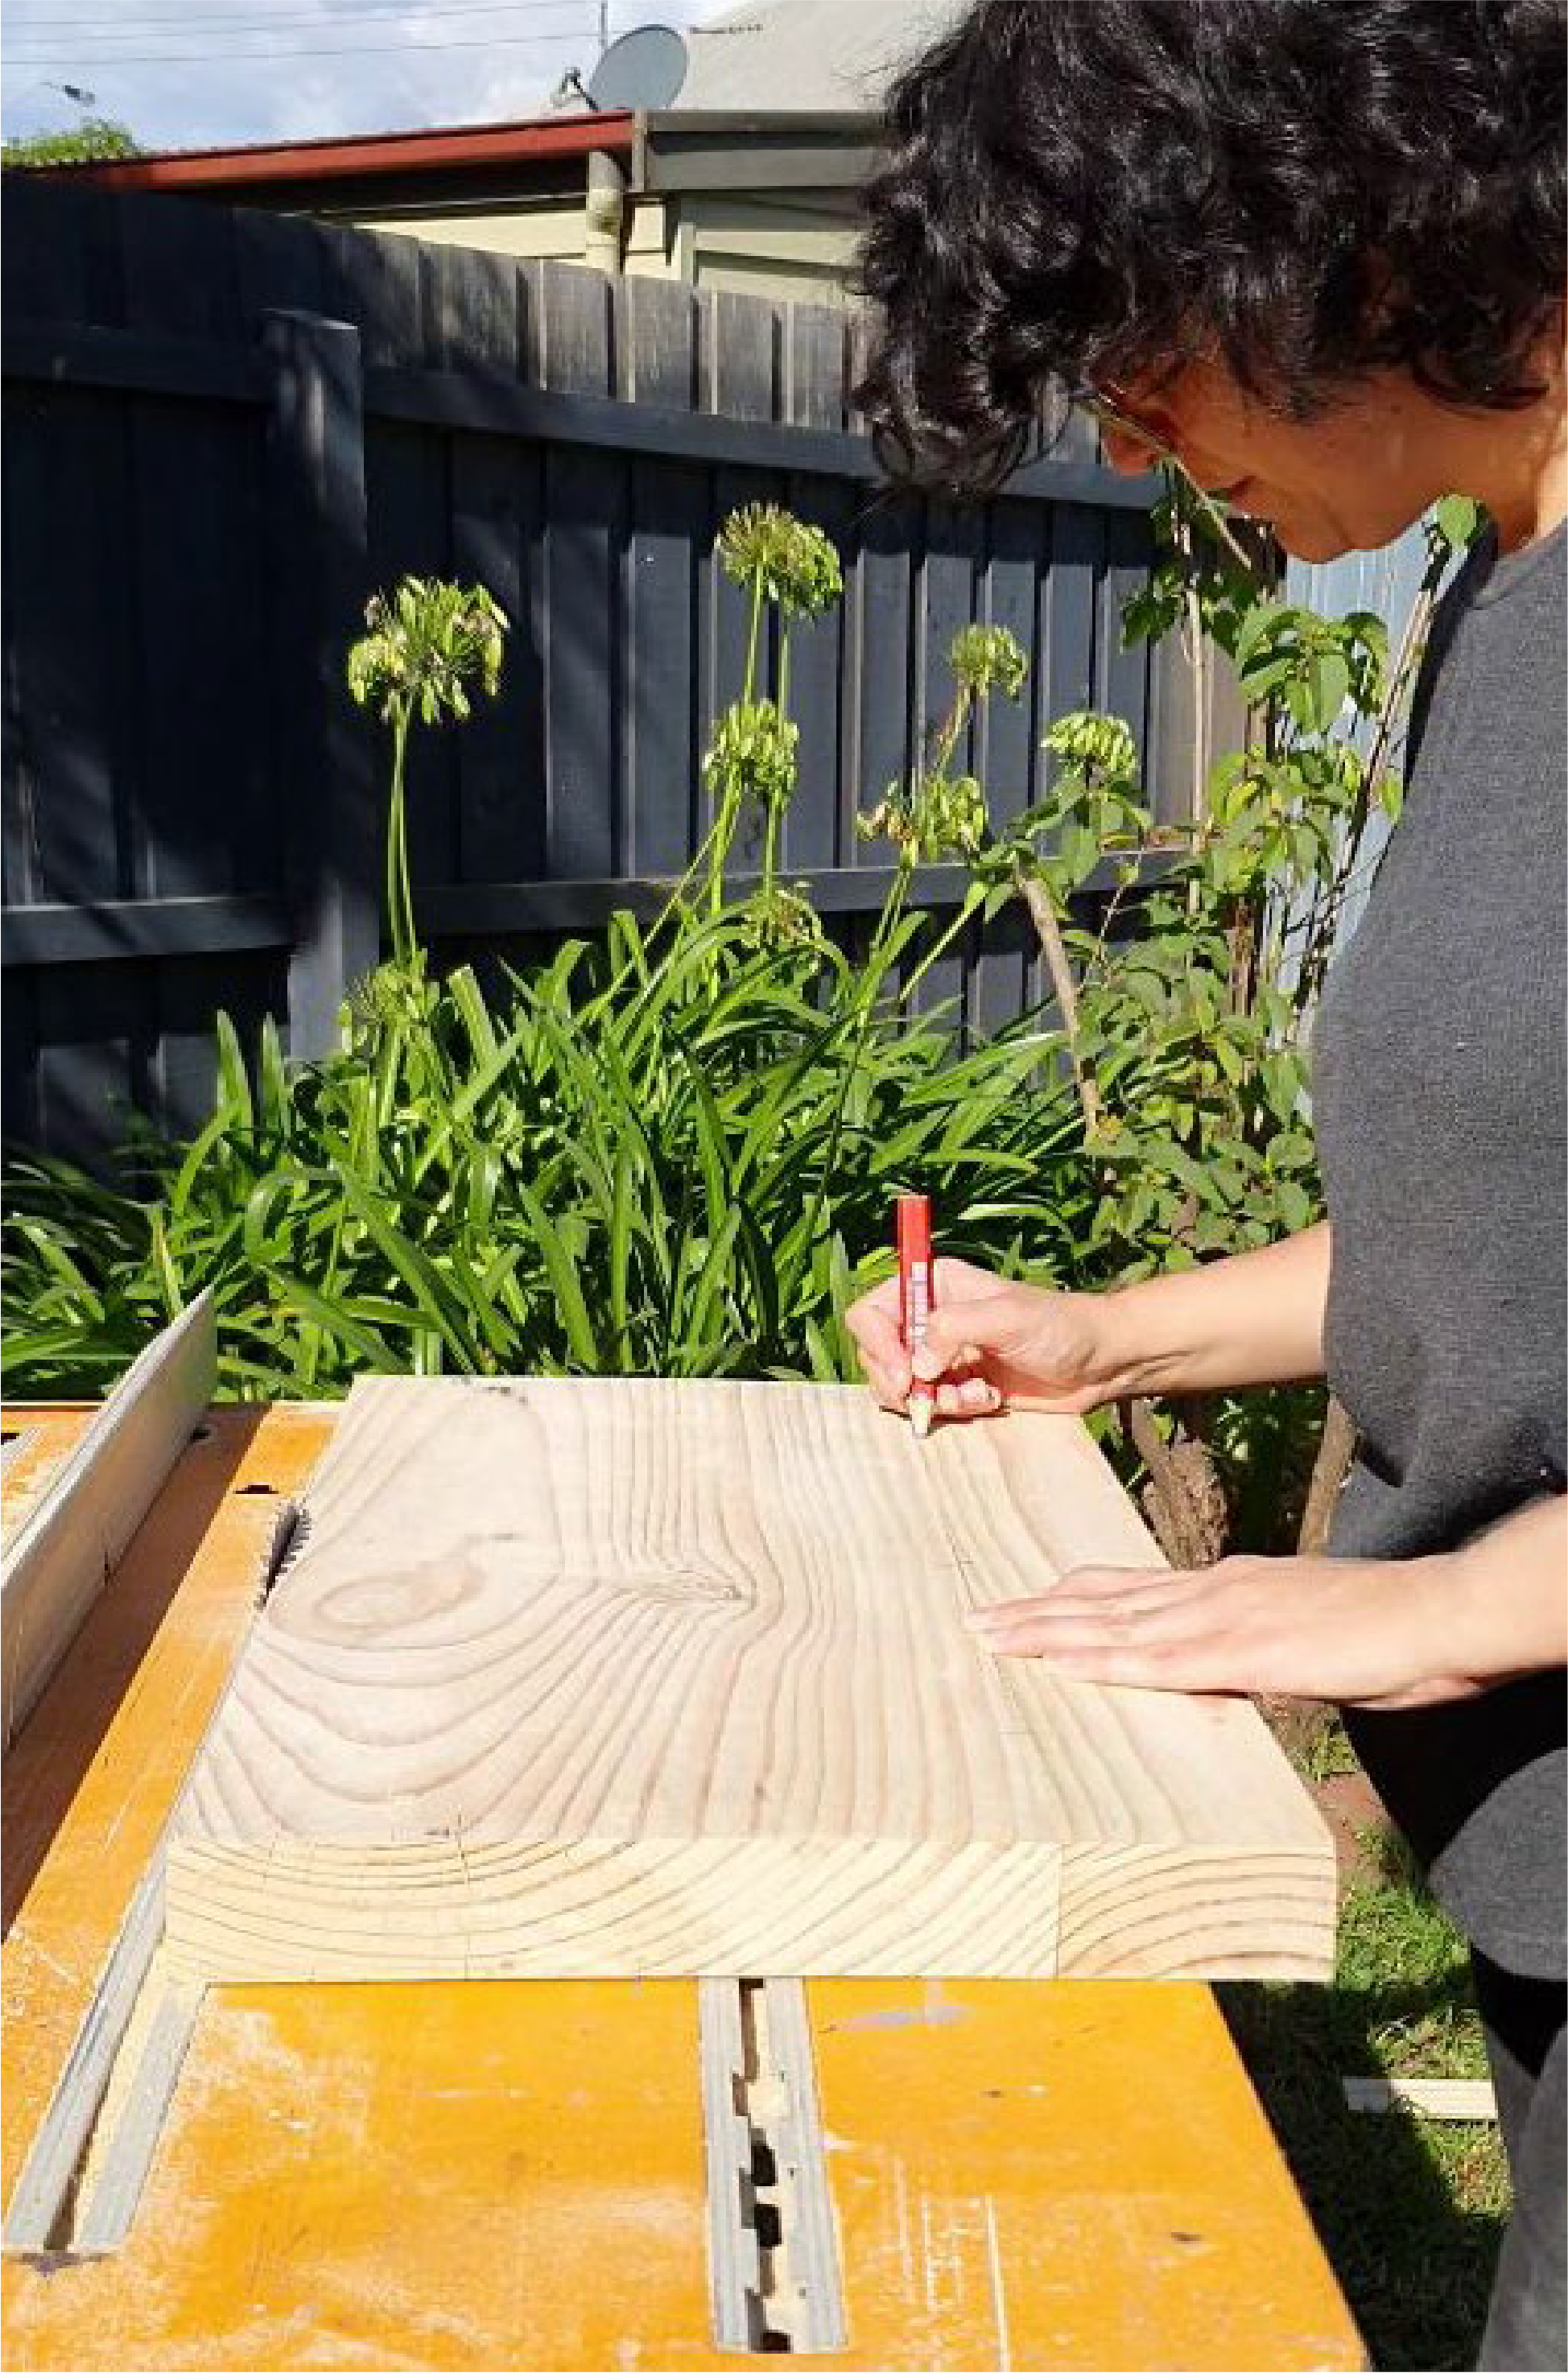
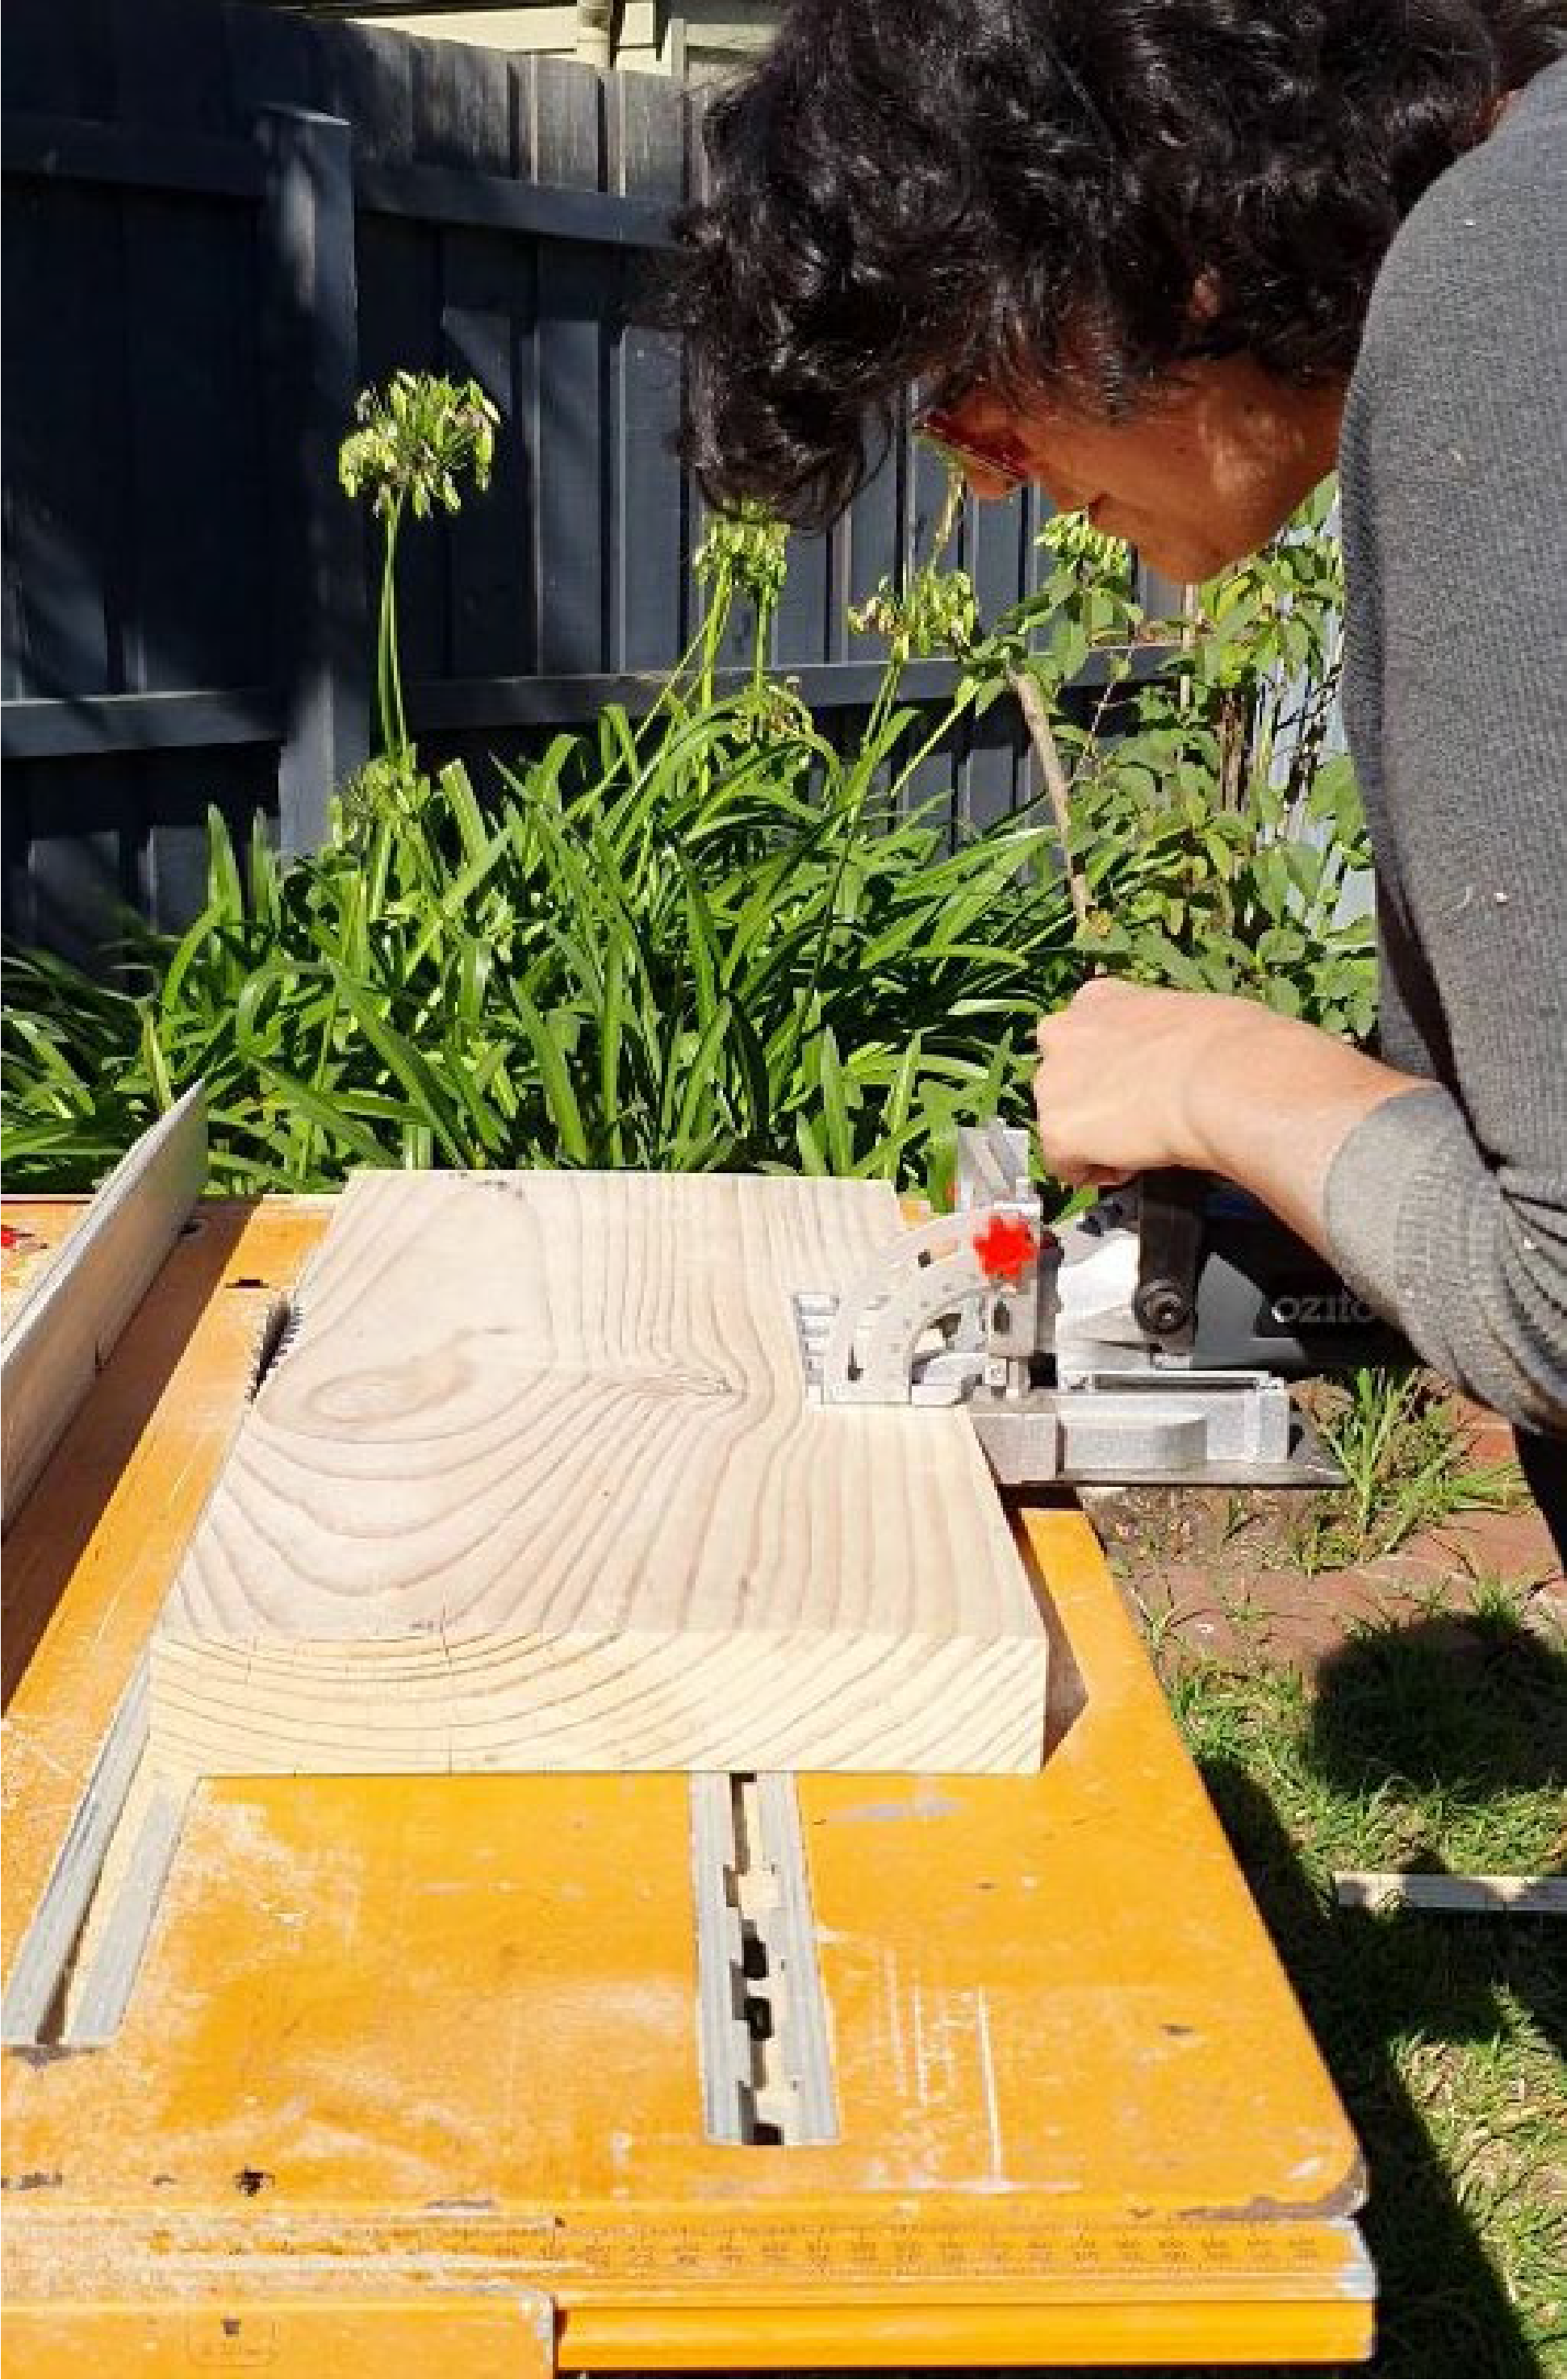
Step Four: Mark it!
Put the two pieces together and pencil three marks on the joining edge of pieces 1 and 2.
Step Five: Cut it!
Using a biscuit cutter line up each mark and cut into the joining side of pieces 1 and 2. If you don’t have a biscuit saw you can drill holes and use dowels instead.
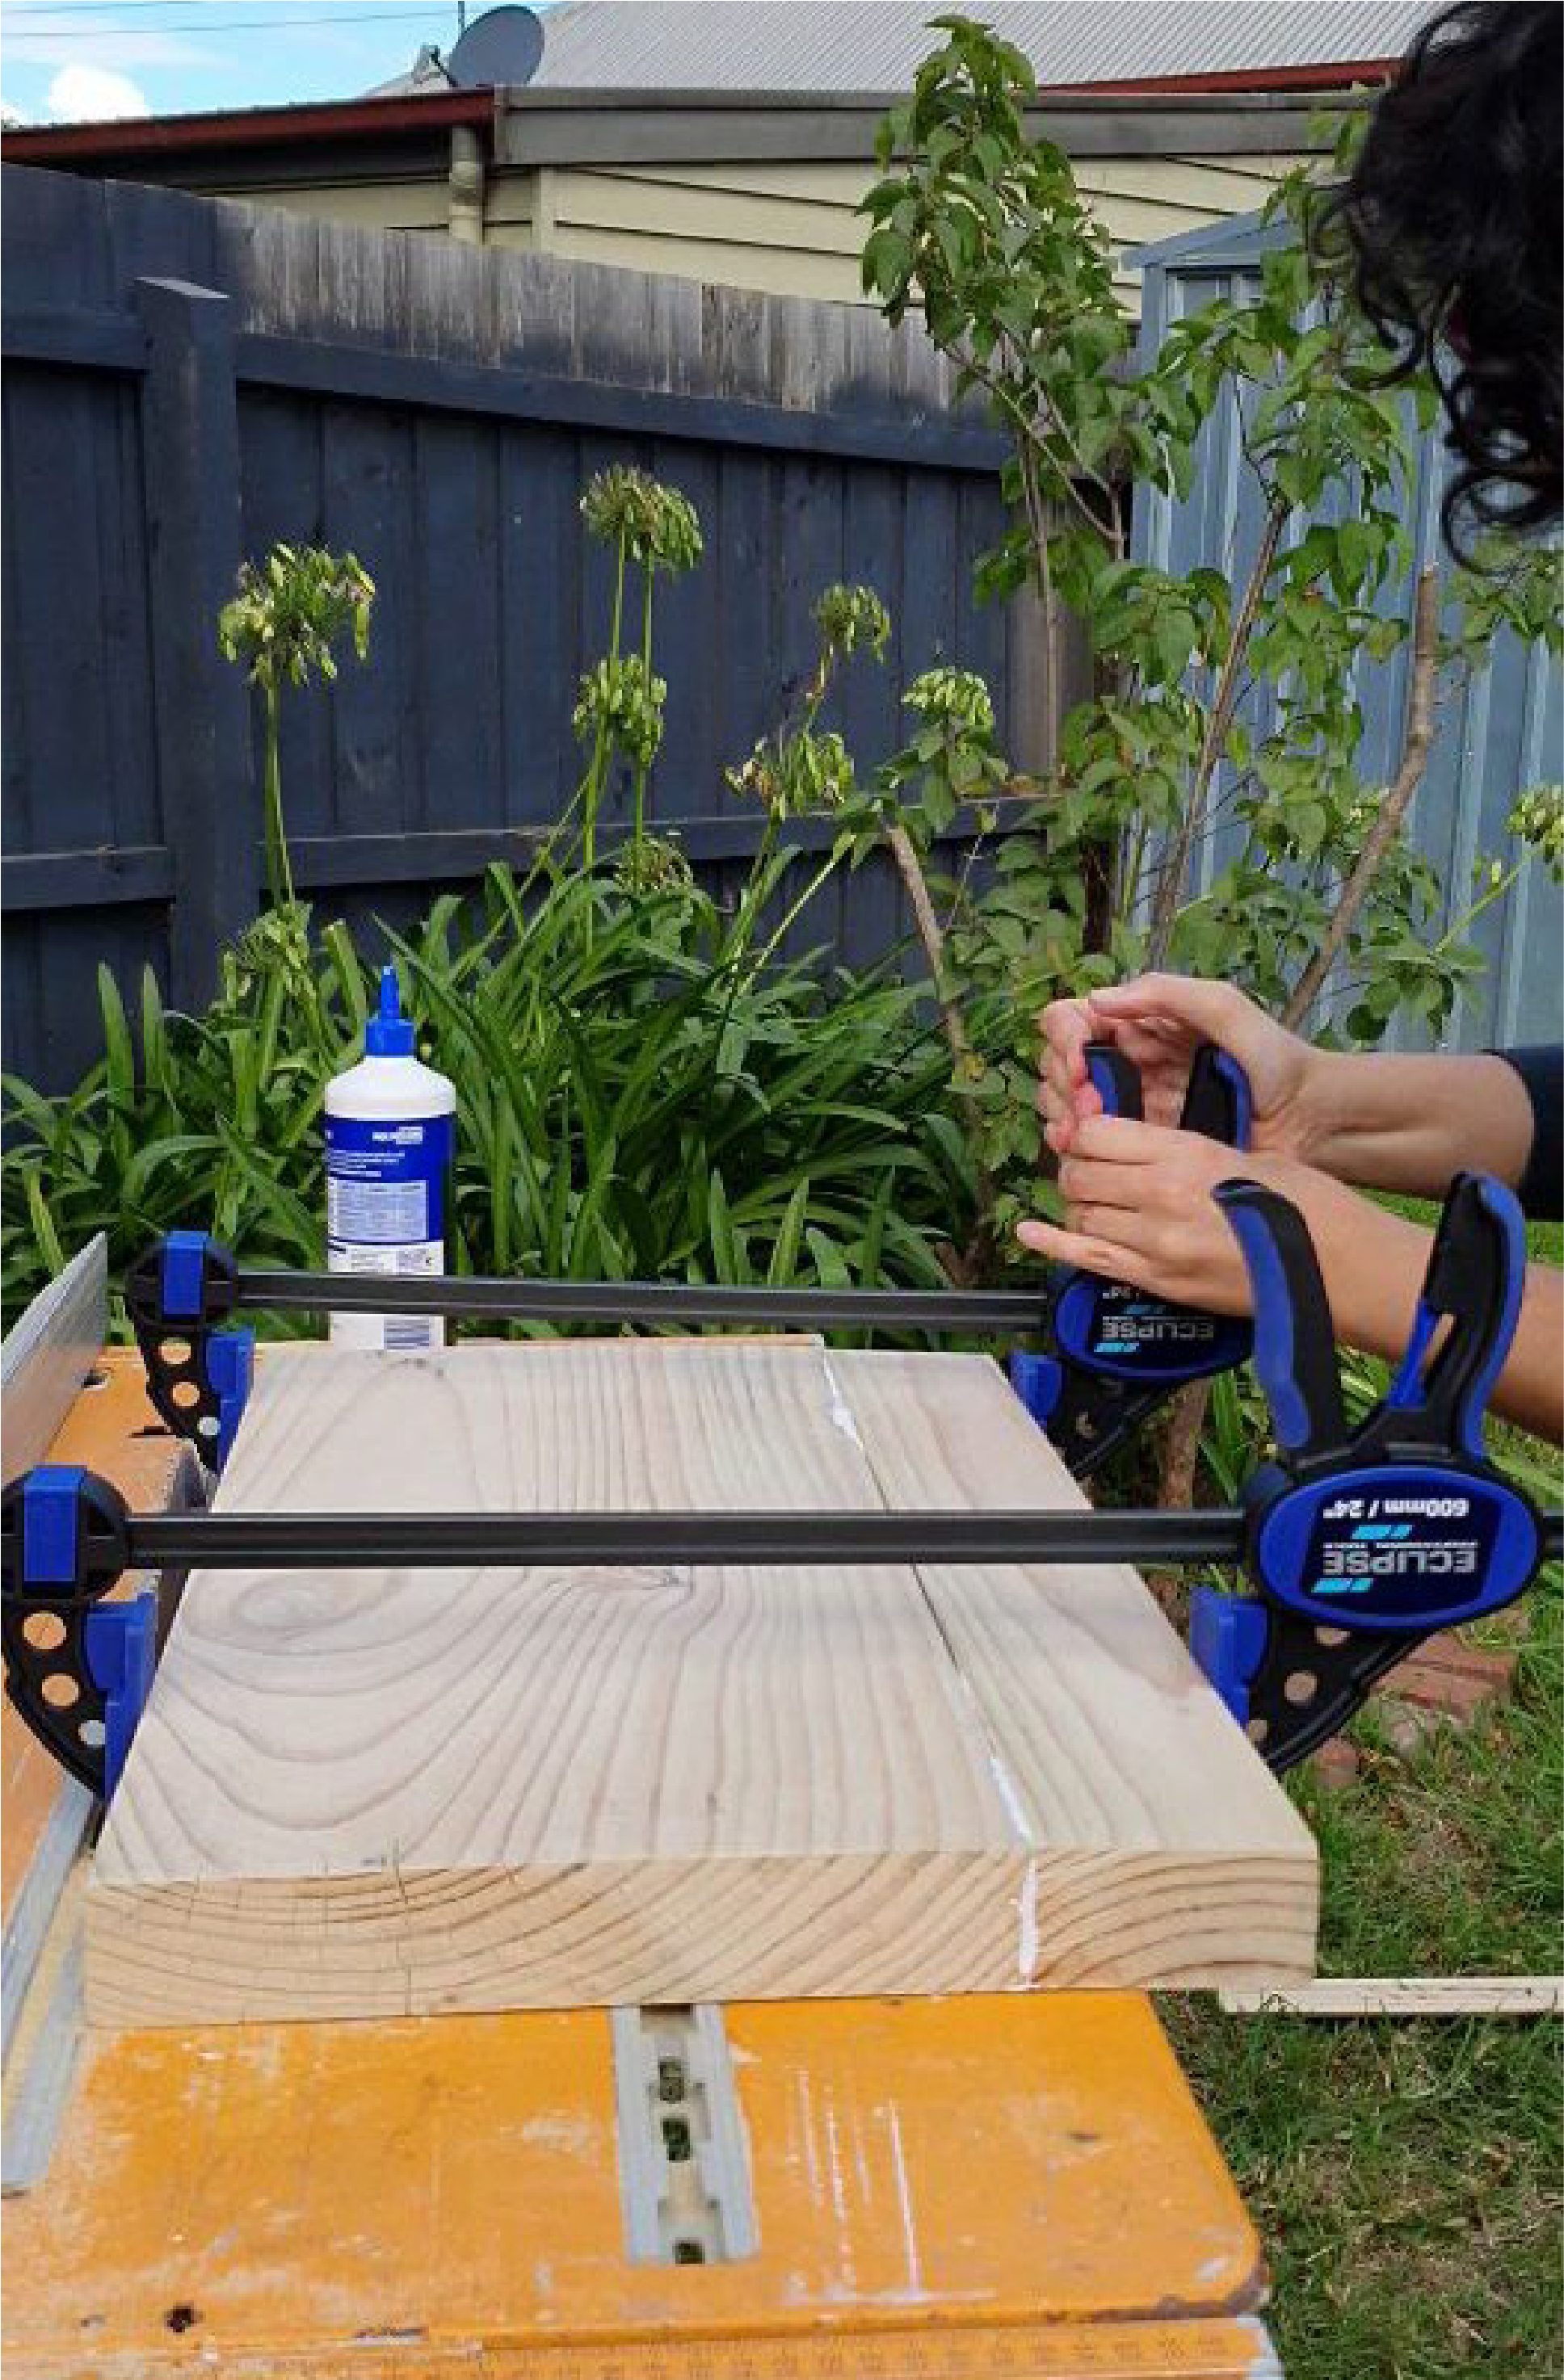
Step Six: Glue it!
Glue the joining edge and put 1 biscuit in each hole.

Step Seven: Glue it!
Glue both timber pieces together and clamp overnight to dry. Use saw dust mixed with glue if you find any gaps in between you pieces of timber.
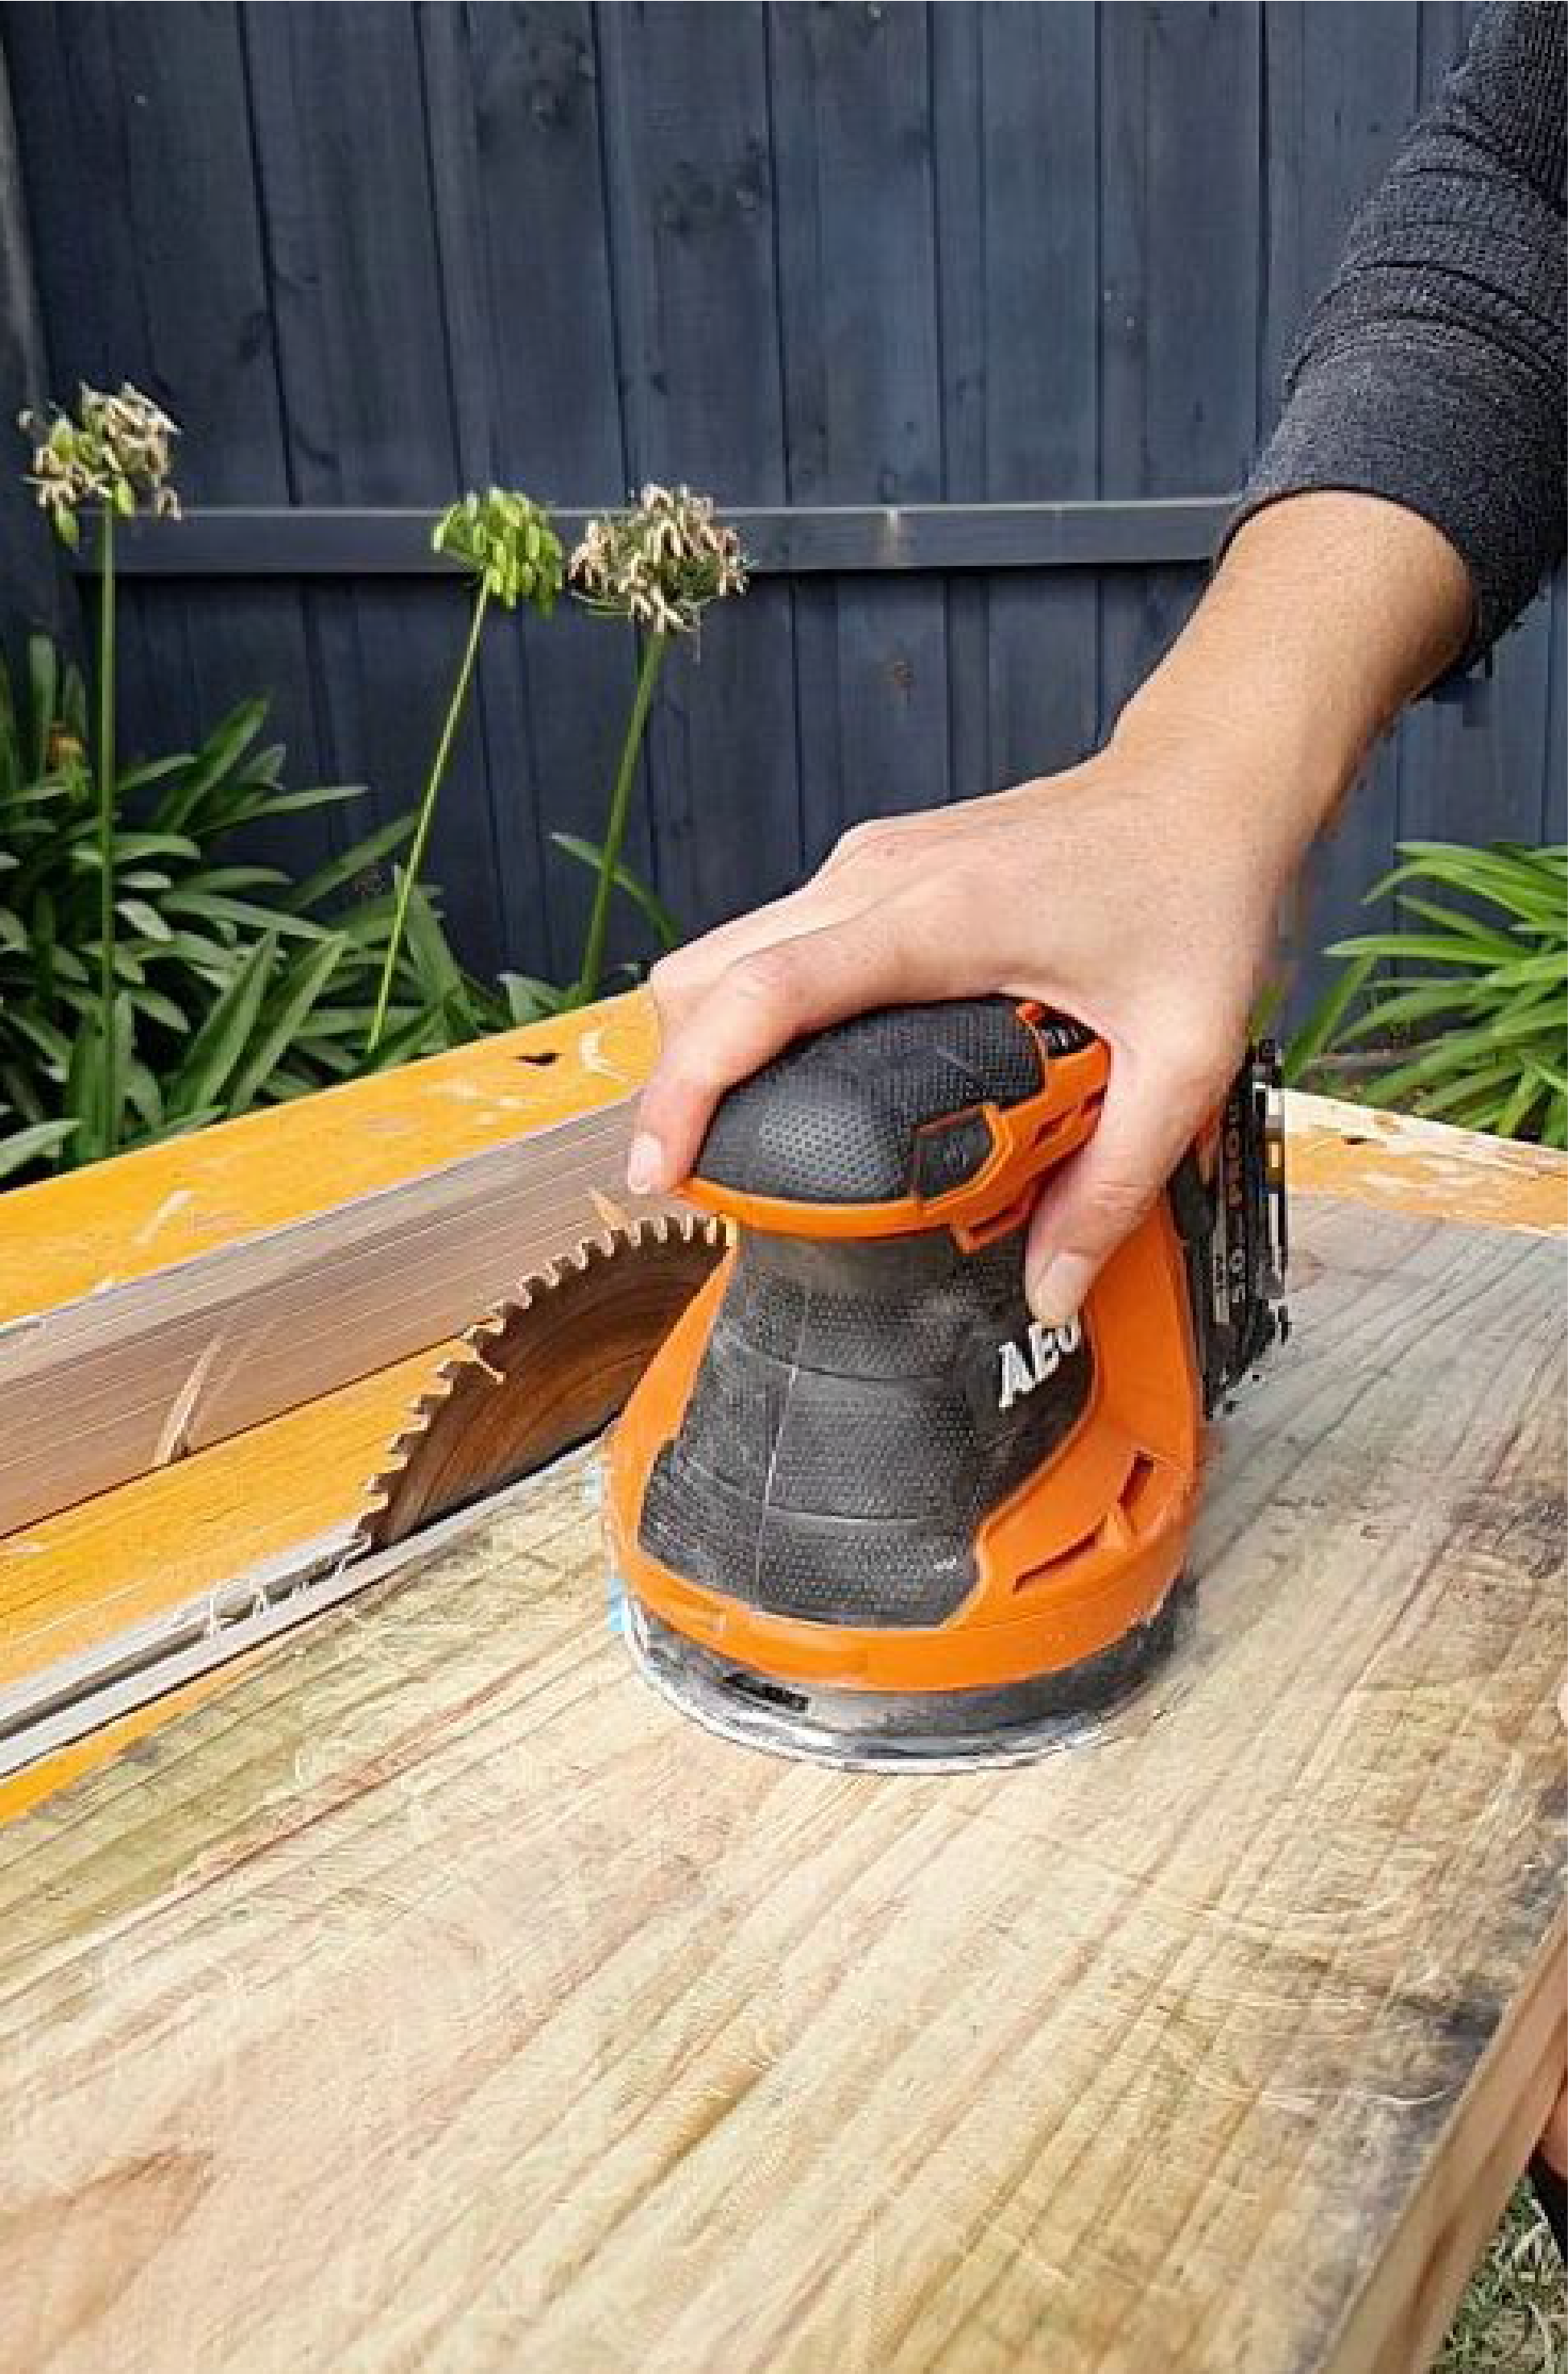
Step 8: Sand it!
Sand every side and edge to a smooth finish. Start with 80 grit to take off any glue and rough edges. Then use 120 grit sand paper to smooth the surface ready to coat.
Use either an orbital sander or sand paper and sanding block.
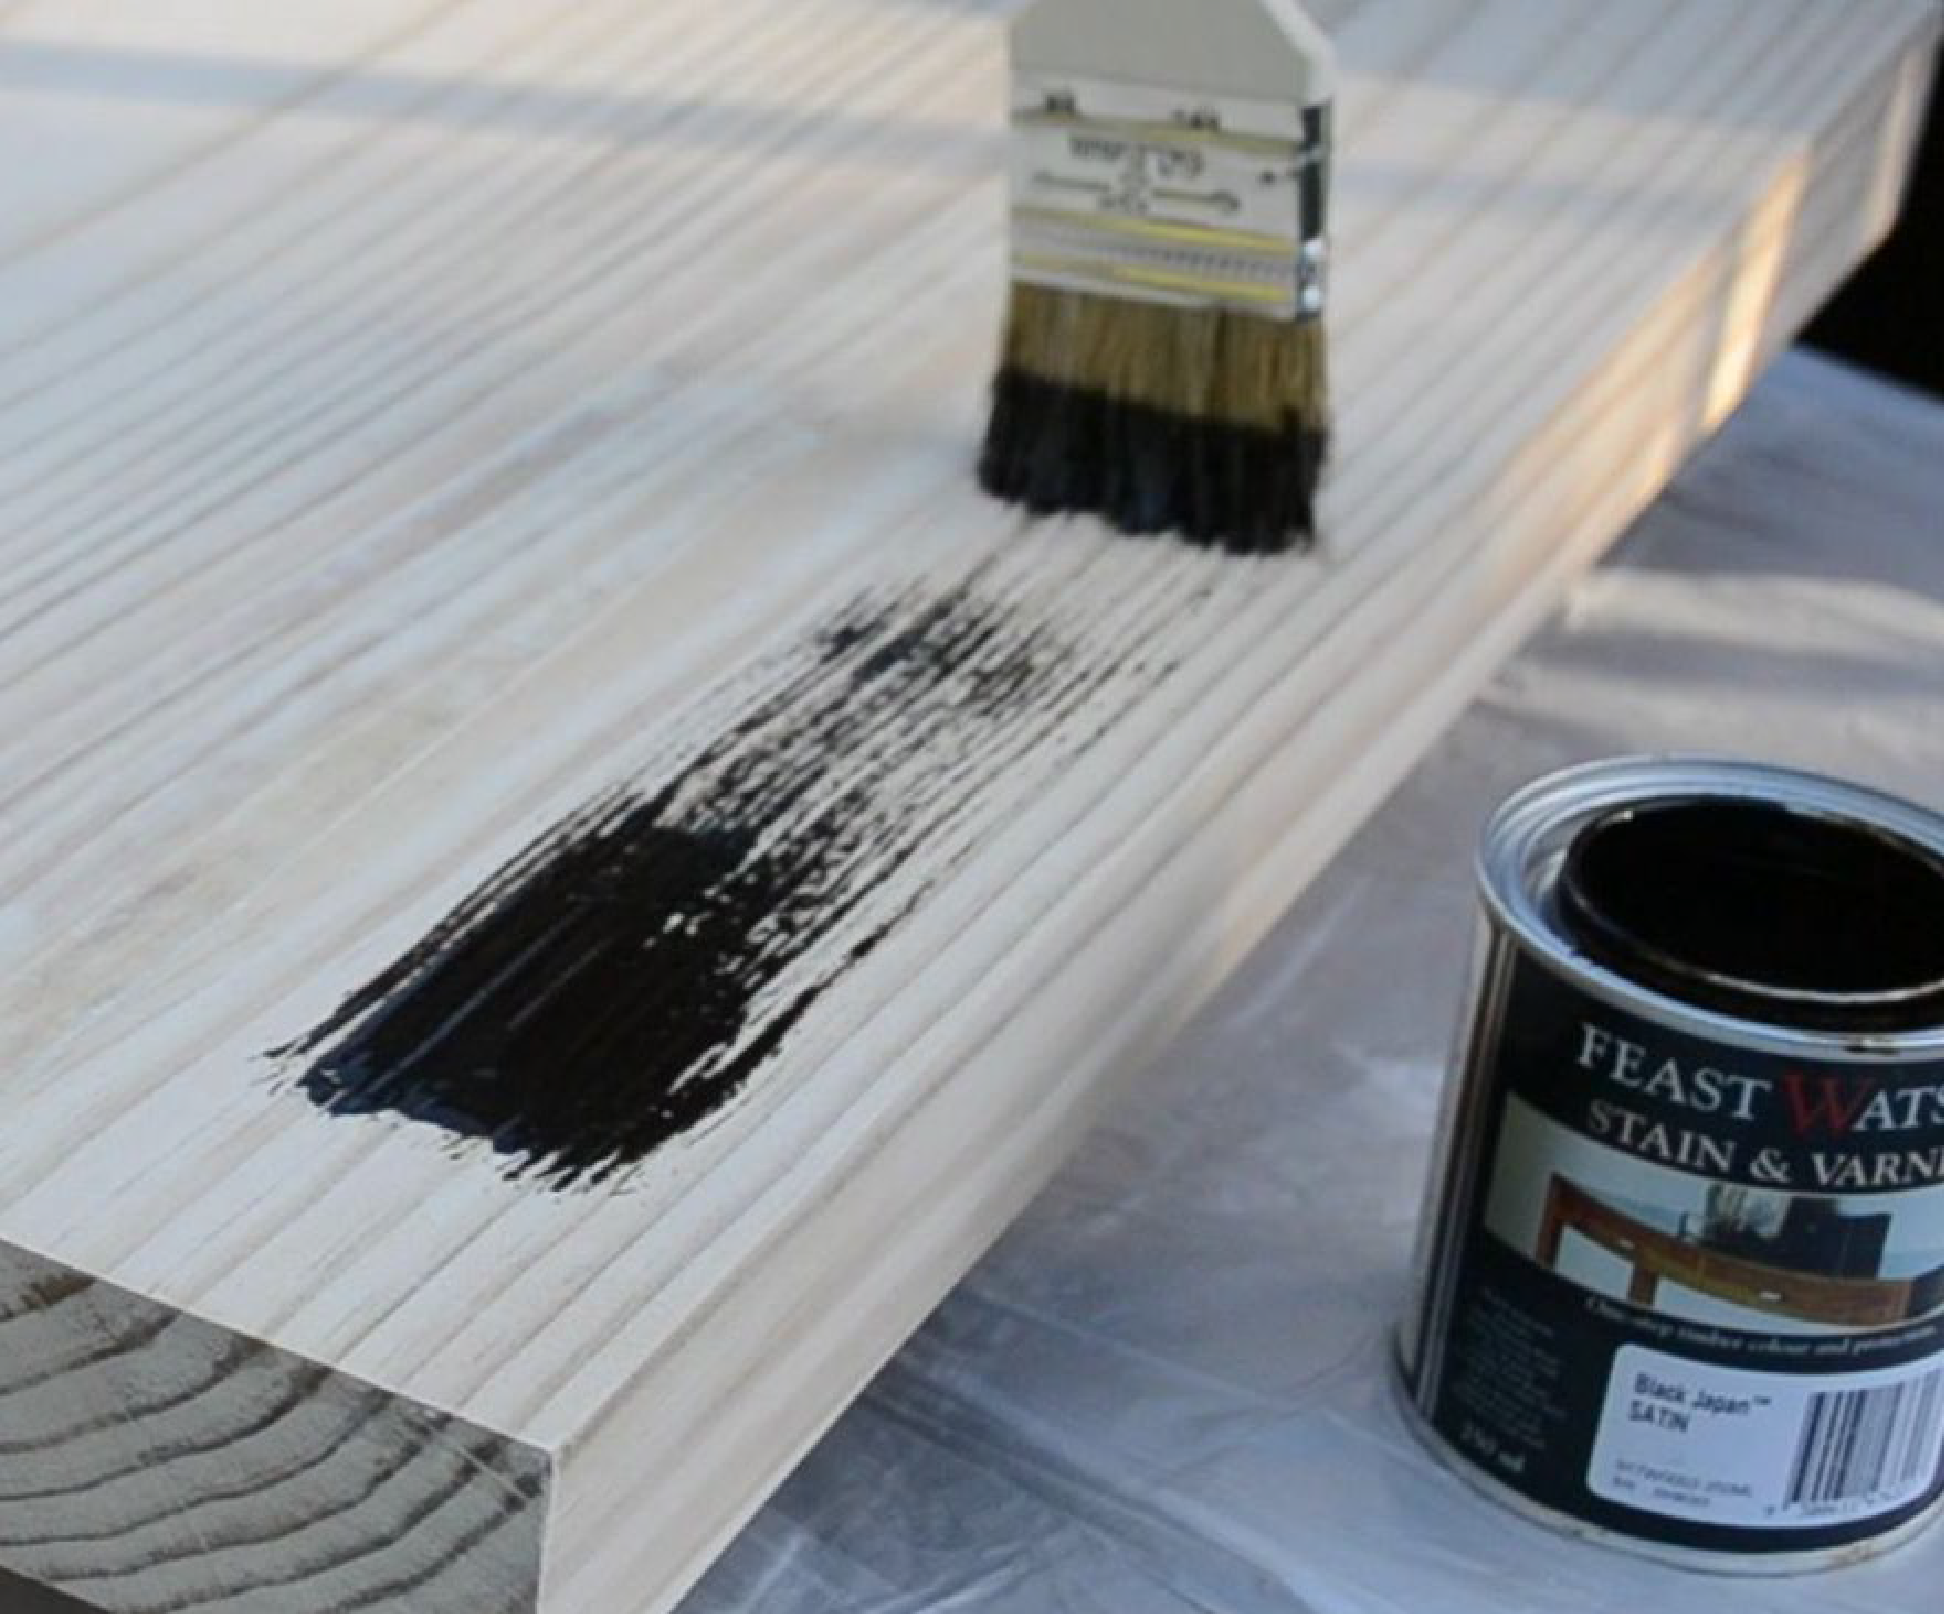
Step 9: Coat it!
Grab your pot of Feast Watson’s Stain and Varnish. Dust off your timber, stir the pot with a flat stirrer, and pour into a roller tray or dip your brush straight into the can.
Coat your timber with one coat. Allow to dry overnight. Use 240 grit sand paper to lightly sand between coats. Add a second coat of Stain and Varnish. Allow to dry overnight.
To Finish!
Remove the glass top from the Vittsjo stand. Attach your stained timber table top to the stand using four screws (the size of these depends on the thickness of your timber).
Lastly, place your finished laptop stand absolutely anywhere you choose. The piece allows for complete freedom to use your laptop in any space around your home or office. The Feast Watson range ensures this stained timber-top-look is sure to add effortless sophistication to any space. You can totally customise the look of the table and either maintain the same look by re-staining and varnishing every 12-18 months or completely change the look of the table top by sanding it back and choosing another great colour in the Stain and Varnish range.
For a little inspiration take a look at the beautiful combinations we have used here with frame and top colours. What colour will you try?
How To video
Do you find it easier to watch the video? We do too. Take a look at the video here if you would like to see it in action. The best part is you can choose the colour that suits your decor. Here are some suggestions for you.
Suggested For You


